By Chef Albert | The Science of Perfect Flavour
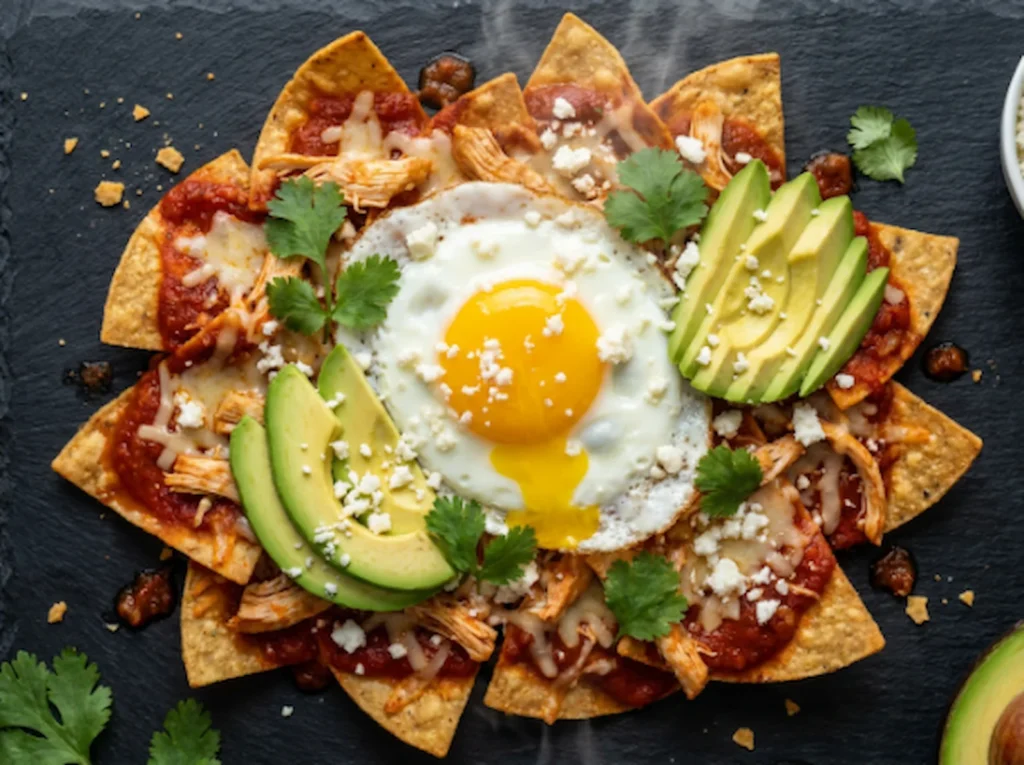
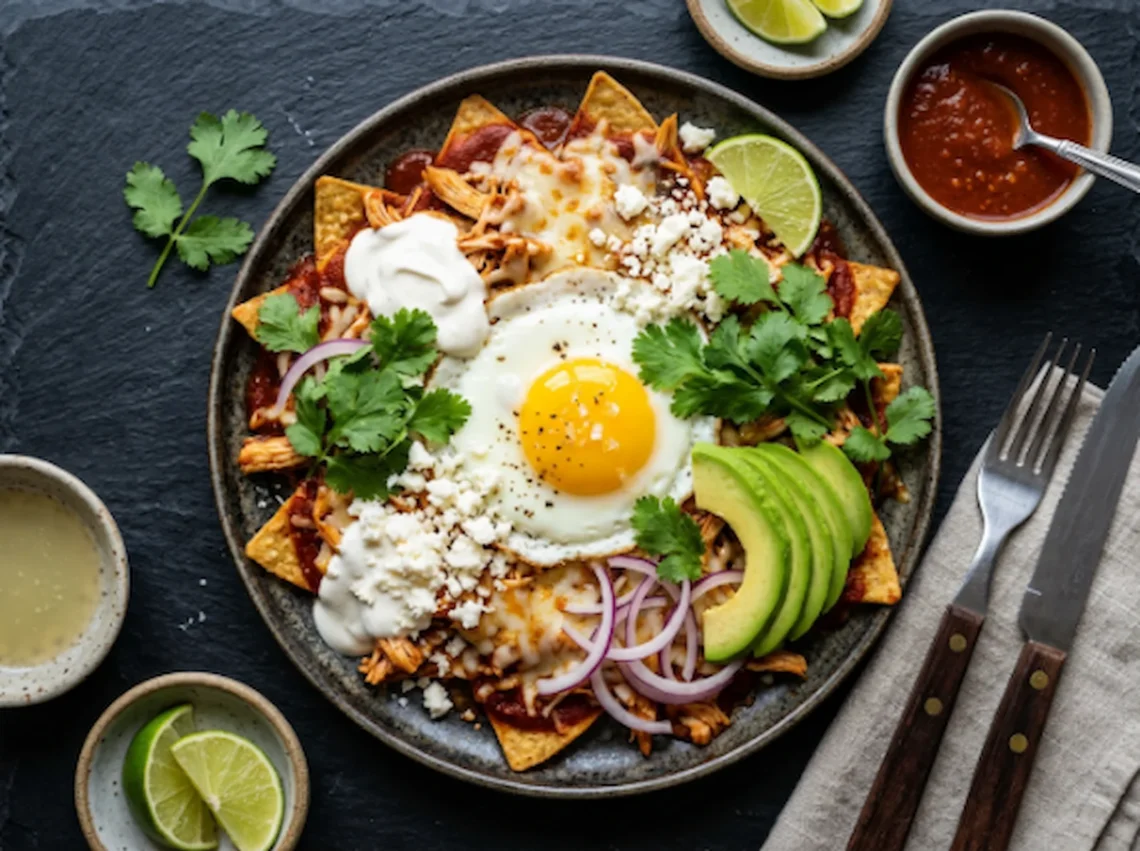
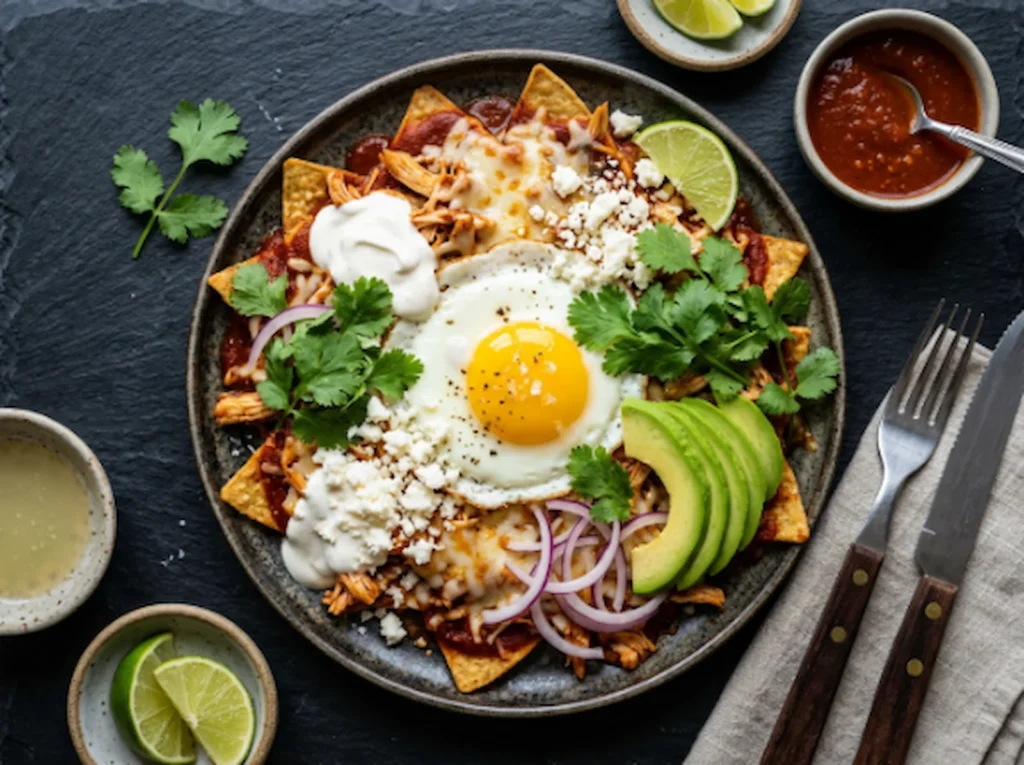
There is a particular kind of comfort that comes from a plate of chilaquiles on a Saturday morning. The crispy-edged tortilla chips softened just enough by warm red sauce, the stretchy melted cheese pulling away in long strands, the runny yolk from a fried egg bleeding into everything and turning each bite into something rich and satisfying. This is not delicate brunch food. This is the kind of breakfast that fills you up, wakes you up, and reminds you why Mexican home cooking has stayed vibrant for generations.
I have made cheesy chicken chilaquiles rojos more times than I can count, adjusting the thickness of the sauce to find the perfect balance between crispy and tender, testing different chile combinations to get the right level of warmth without overwhelming heat, and learning exactly when to pull the pan off the stove so the chips retain just enough crunch. The dish itself is deceptively simple: fried corn tortilla chips bathed in a red guajillo-tomato sauce, tossed with shredded chicken, and finished with melted cheese and a fried egg. But the difference between a soggy, one-note version and one that makes you scrape the pan clean comes down to technique and timing.
The biggest challenge with chilaquiles is textural control. Pour the sauce over the chips too early and they turn to mush before you plate them. Use store-bought chips that are too thin and they disintegrate on contact. Skip the frying step entirely and you lose the crispy foundation that makes the dish work. But when you fry thick corn tortillas into sturdy chips, toss them in warm sauce at the last possible moment, and layer in cheese while the pan is still hot, you get a dish that balances crispy, tender, savory, and rich in every single bite.
Why Corn Tortillas Need to Be Fried Fresh
Corn tortillas are made from masa harina—nixtamalized corn flour mixed with water and pressed into thin rounds. When fresh, they are soft and pliable, perfect for tacos or enchiladas. But for chilaquiles, you need structure. You need chips that can stand up to a warm, acidic sauce without falling apart immediately.
Frying transforms the texture of corn tortillas in two critical ways. First, the high heat drives off moisture, turning the soft tortilla into a crispy chip. Second, the hot oil gelatinizes the surface starches, creating a thin, crispy shell that acts as a barrier against liquid. This barrier is what allows the chip to absorb some sauce and soften slightly while still retaining a crisp edge.
Day-old tortillas work even better than fresh ones because they have already lost some moisture through evaporation. When you fry a slightly dried tortilla, it crisps up faster and develops a deeper golden color and more complex flavor. Fresh tortillas contain more water, which means they take longer to fry and can sometimes puff up unevenly or develop chewy spots.
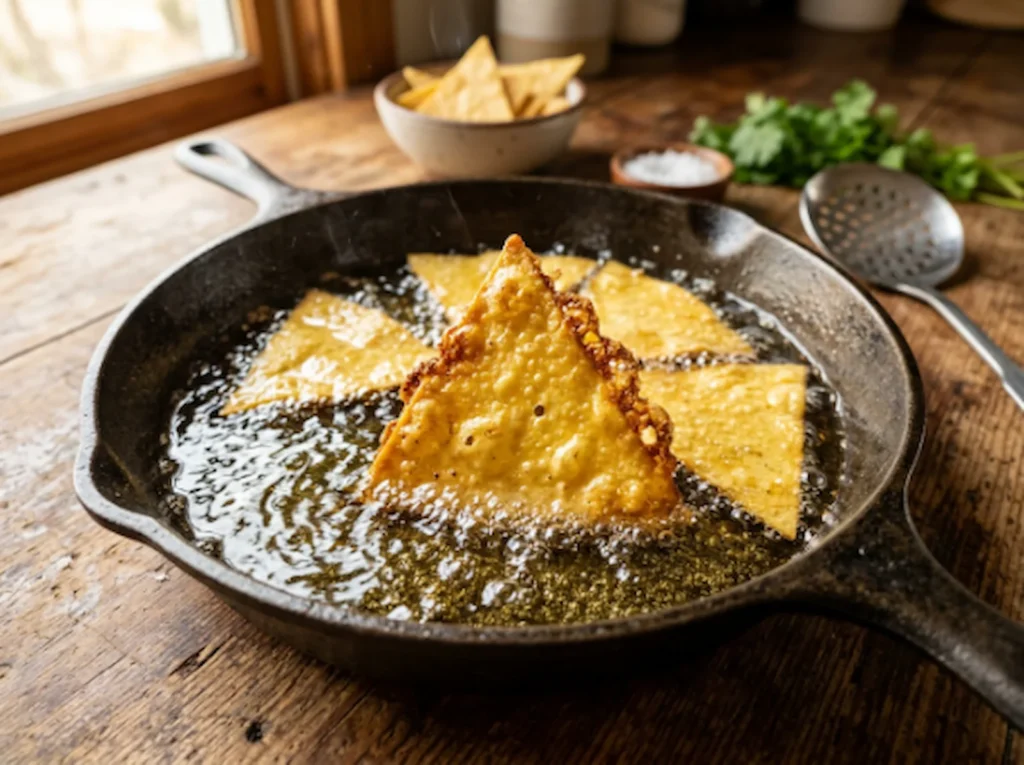
The oil temperature matters. If the oil is too cool (below 325°F), the tortillas absorb excess oil and turn greasy instead of crispy. If the oil is too hot (above 375°F), the exterior burns before the interior dries out, leaving you with chips that are dark and bitter. The sweet spot is around 350°F—hot enough to fry quickly and develop color, but controlled enough to ensure even crisping.
You can use store-bought thick-cut tortilla chips as a shortcut, but the texture will not be quite the same. Commercial chips are often made from masa that has been extruded and baked or fried in industrial equipment, which creates a different structure than home-fried tortillas. They work in a pinch, but if you have the time, frying your own chips elevates the entire dish.
The Chemistry of Guajillo Chile and Tomato Red Sauce
Guajillo chiles are one of the backbone dried chiles in Mexican cooking. They are large, smooth-skinned, and relatively mild, measuring between 2,500 and 5,000 Scoville Heat Units—about the same heat level as a moderate jalapeño, but with a completely different flavor profile. Guajillos taste fruity, tangy, and slightly smoky, with notes of dried cranberry, tea, and a subtle earthiness that complements tomatoes beautifully.
Dried chiles need to be rehydrated before they can be blended into a sauce. Toasting them briefly in a dry pan before soaking deepens their flavor by activating aromatic compounds that remain dormant in the dried state. The toasting process also makes the chiles more pliable and easier to blend into a smooth puree.
When you blend rehydrated guajillo chiles with canned whole tomatoes, onion, garlic, and chicken broth, you create a bright red sauce with a balanced acidity and gentle warmth. The tomatoes add body and sweetness, the onion and garlic add savory depth, and the chicken broth thins the sauce to a pourable consistency that coats the chips without drowning them.
Simmering the blended sauce for 8 to 10 minutes serves several purposes. First, it cooks off the raw onion and garlic flavors, making the sauce taste smoother and more integrated. Second, it reduces the liquid slightly, concentrating the flavors and thickening the sauce so it clings to the chips instead of pooling at the bottom of the pan. Third, it mellows the sharpness of the tomatoes and chiles, creating a rounder, more balanced flavor.
The Culinary Institute of America’s Mexican Culinary Arts emphasizes the importance of proper chile rehydration and tomato salsa reduction techniques, noting that traditional methods yield far superior depth and complexity compared to shortcuts.
The acidity in the tomatoes and chiles also plays a functional role. Acidic sauces help break down the exterior of the fried tortilla chips slightly, allowing them to absorb flavor without becoming completely soggy. This is why chilaquiles taste better when the chips are tossed with the sauce just before serving—the acid begins to soften the chips immediately, so timing is everything.
Why Oaxaca Cheese Melts Better Than Most
Oaxaca cheese, also called quesillo, is a semi-soft, white cheese made from cow’s milk. It is produced using a stretched-curd method similar to mozzarella, which gives it a stringy, melty texture when heated. The curds are kneaded and stretched while still warm, then wound into balls or braids, which is why you often see it sold in a distinctive round, rope-like shape.
When Oaxaca cheese melts, it does not break or separate easily because the stretched-curd structure allows the fat and protein to remain integrated even at high temperatures. This is the same reason mozzarella stretches beautifully on pizza. The milk proteins align during the stretching process, creating a network that holds the fat in suspension, even when the cheese is fully melted.
For chilaquiles, this means you get long, gooey strands of cheese that cling to the chips and chicken without turning greasy or clumpy. Monterey Jack is a good substitute if you cannot find Oaxaca cheese—it melts smoothly and has a mild, buttery flavor that complements the red sauce without competing with it. Avoid pre-shredded cheese if possible, as the anti-caking agents (usually cellulose or potato starch) prevent proper melting and can leave a grainy texture.
Buying the Right Ingredients
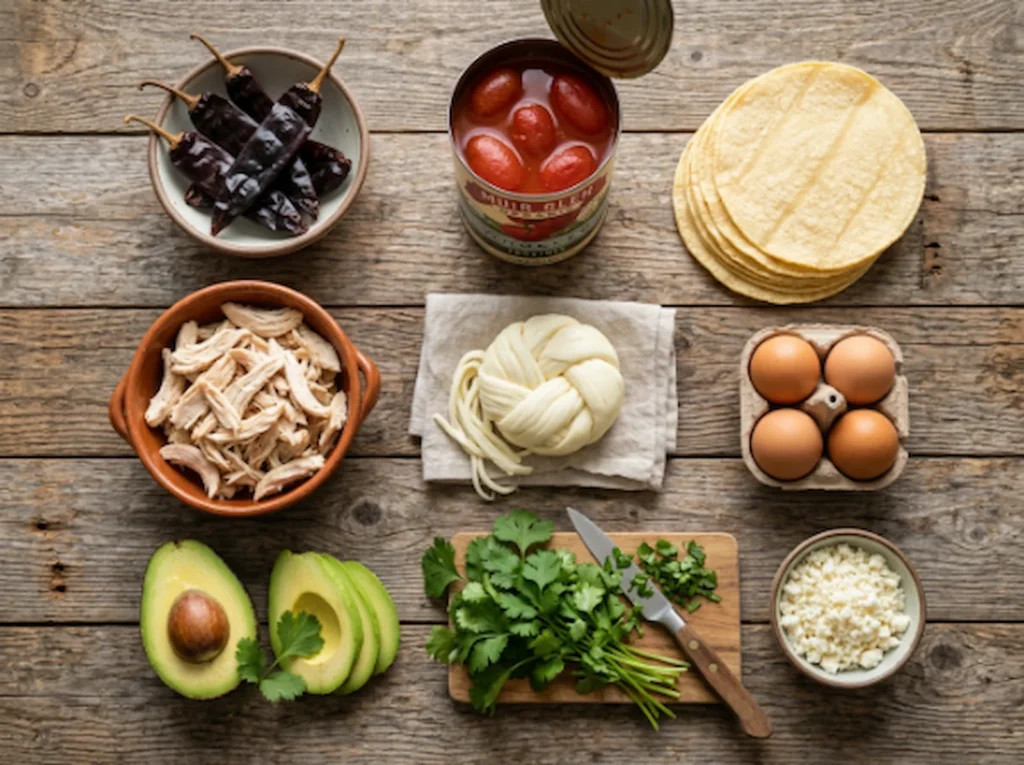
Dried guajillo chiles are sold in the Latin foods section of most grocery stores, usually in small plastic bags hanging near the dried beans and masa harina. Look for chiles that are pliable, not brittle—brittle chiles are old and have lost most of their flavor. The skin should be smooth and glossy, with a deep burgundy color. Avoid any with white spots or a dusty coating, which indicates mold or age.
Corn tortillas for frying should be thick and made from 100% corn masa. Brands like Mission, Guerrero, and La Banderita are widely available, but if you have access to a local tortilleria or a Mexican grocery store, the fresh, handmade tortillas are far superior. They fry up crispier and have a deeper corn flavor.
For the chicken, rotisserie chicken from the grocery store is a convenient shortcut. One rotisserie chicken yields about 3 to 4 cups of shredded meat, which is more than enough for this recipe. If you prefer to cook your own, poach boneless, skinless chicken breasts in lightly salted water for 15 to 18 minutes until they reach an internal temperature of 165°F, then shred with two forks. USDA Food Safety Inspection Guidelines recommend a minimum internal temperature of 165°F for all poultry to ensure harmful bacteria are eliminated.
Oaxaca cheese is sold at Whole Foods, Trader Joe’s, and most stores with a well-stocked cheese section. It is usually found near the specialty or international cheeses, often in a round ball or braided rope. If you cannot find it, whole-milk mozzarella or Monterey Jack are the best substitutes.
Mexican crema is thicker and tangier than sour cream, with a pourable consistency that drizzles beautifully over hot chilaquiles. Cacique and El Mexicano are reliable brands found in the refrigerated Latin foods section. If you cannot find Mexican crema, thin regular sour cream with a tablespoon of milk or heavy cream to get a similar texture.
Ingredients
| For the Red Guajillo Sauce | US Customary | Metric |
|---|---|---|
| Dried Guajillo Chiles (stemmed and seeded) | 3 whole | 3 whole |
| Whole Peeled Tomatoes (with juice) | 1 can (14.5 oz) | 400g |
| Yellow Onion (chopped) | 1/2 medium | 75g |
| Garlic Cloves (peeled) | 2 cloves | 8g |
| Low-Sodium Chicken Broth | 1 cup | 240ml |
| Ground Cumin | 1/2 tsp | 2g |
| Kosher Salt | 1 tsp | 6g |
| For the Chilaquiles & Assembly | US Customary | Metric |
|---|---|---|
| Corn Tortillas (cut into 6 wedges each, or thick tortilla chips) | 12 tortillas (or 8 oz chips) | 12 tortillas (or 225g chips) |
| Vegetable Oil (for frying) | 1/3 cup | 80ml |
| Cooked Shredded Chicken Breast | 2 cups | 300g |
| Oaxaca Cheese or Monterey Jack (shredded) | 1.5 cups | 170g |
| Large Eggs (fried to order) | 4 eggs | 4 eggs |
| Mexican Crema (for drizzling) | 1/4 cup | 60ml |
| Cotija Cheese (crumbled, for garnish) | 1/4 cup | 30g |
| Ripe Avocado (sliced) | 1 medium | 1 medium |
| Fresh Cilantro Leaves (for garnish) | 1/4 cup | 10g |
Common Mistakes and How to Avoid Them
| The Mistake | What Actually Happens | The Fix |
|---|---|---|
| Using thin, commercial tortilla chips | The chips dissolve into mush the moment the sauce touches them | Fry thick corn tortillas yourself or buy thick-cut restaurant-style chips that can withstand sauce |
| Adding the sauce to the chips too early | The chips absorb too much liquid and lose all crispness before you serve them | Toss the chips with the warm sauce just before plating, leaving some edges exposed for textural contrast |
| Skipping the chile toasting step | The sauce tastes flat and one-dimensional without the deeper, toasted flavor | Toast the dried guajillo chiles in a dry pan for 1–2 minutes before soaking to activate aromatic oils |
| Frying the tortillas at too low a temperature | The chips absorb excess oil and turn greasy instead of crispy | Maintain oil temperature around 350°F and fry in small batches to prevent the temperature from dropping |
| Using pre-shredded cheese | The anti-caking agents prevent proper melting, leaving the cheese grainy and clumpy | Shred Oaxaca or Monterey Jack cheese from a block yourself for smooth, stretchy melting |
| Overcooking the eggs | Hard yolks do not create the rich, creamy sauce that ties the dish together | Fry the eggs sunny-side-up or over-easy so the yolks stay runny and break over the chilaquiles when served |
Step-by-Step Method
Preparing and Toasting the Dried Chiles
Heat a medium saucepan over medium heat with no oil. Place the dried guajillo chiles in the dry pan and toast them for 1 to 2 minutes, pressing them gently against the hot surface with a spatula. You will smell a deep, fruity aroma as the chiles heat up. Do not let them burn or they will turn bitter.
Remove the toasted chiles from the pan and cover them with hot water. Remove the pan from the heat and let the chiles soak for 10 minutes until they are soft and pliable. Drain the soaking water—it can taste bitter—and transfer the softened chiles to a blender.
Blending the Red Sauce
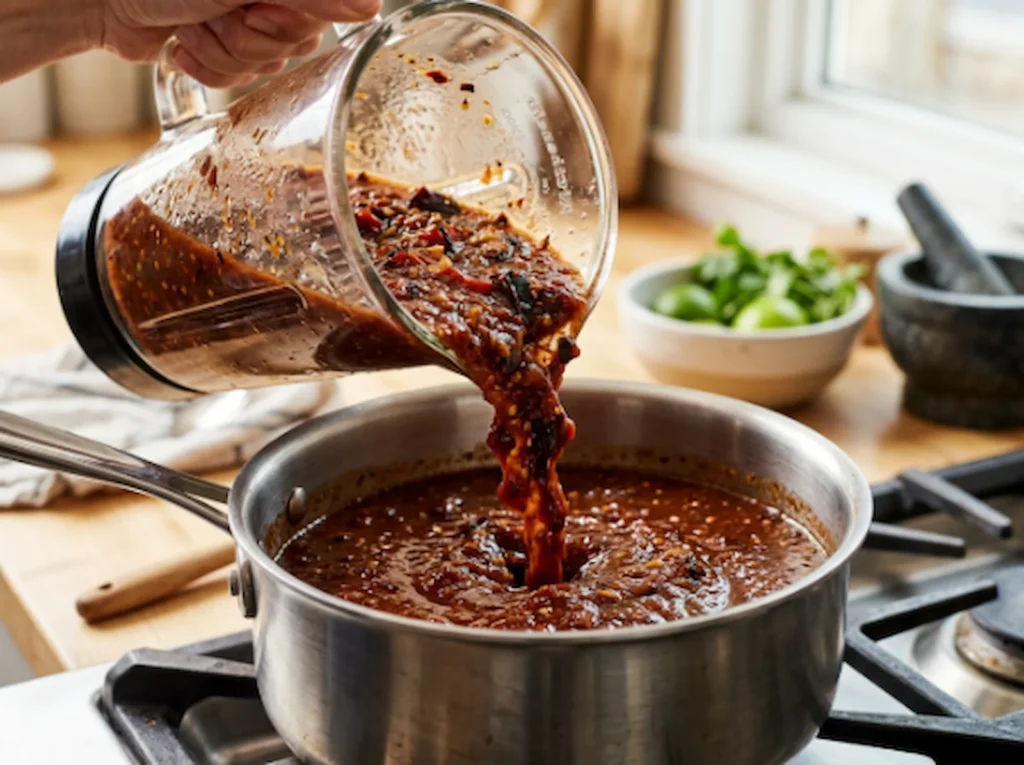
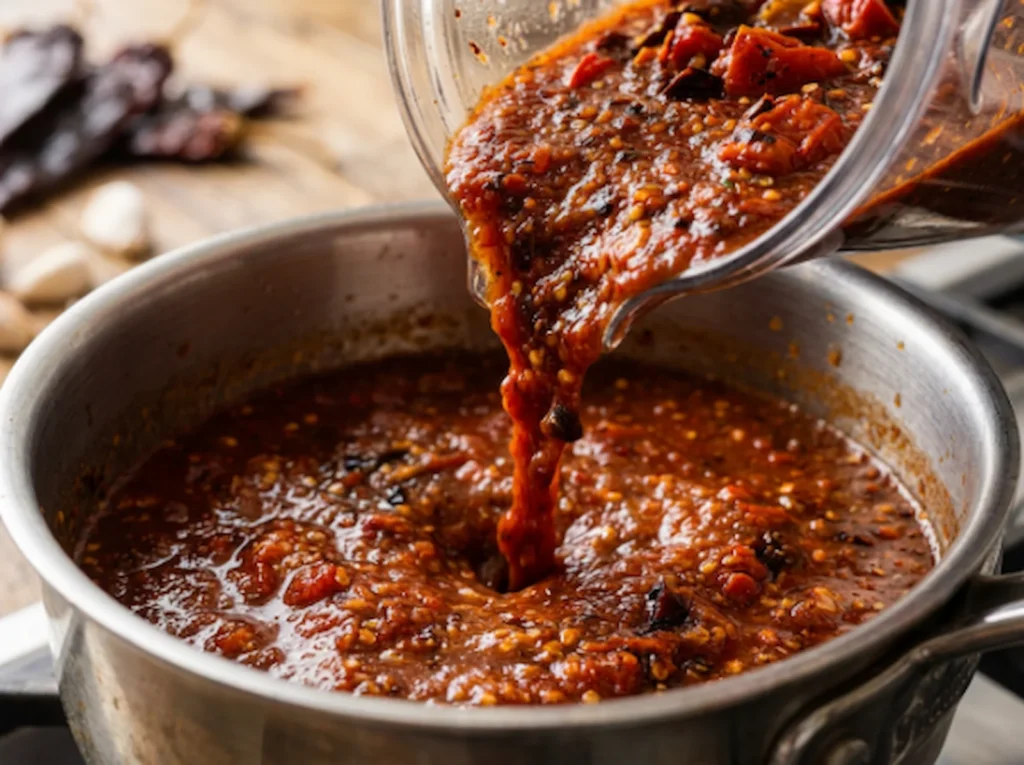
Add the rehydrated guajillo chiles, canned whole tomatoes with their juice, chopped onion, garlic cloves, chicken broth, ground cumin, and kosher salt to the blender. Blend on high speed for 60 to 90 seconds until the sauce is completely smooth with no visible chunks.
The sauce should be a vibrant, deep red color with a slightly thick but pourable consistency. Taste it at this stage—it will taste raw and sharp, but you should be able to detect the fruity heat of the guajillos, the sweetness of the tomatoes, and the savory depth of the onion and garlic.
Simmering the Salsa
Heat 1 tablespoon of vegetable oil in a medium saucepan over medium heat. Pour the blended red sauce into the hot oil—it will sizzle and sputter as it hits the pan. Stir immediately to prevent sticking.
Let the sauce simmer gently for 8 to 10 minutes, stirring occasionally, until it thickens slightly and darkens to a deeper red. The raw garlic and onion flavors will mellow, and the sauce will develop a rounder, more complex taste. If the sauce becomes too thick, add a splash of chicken broth or water to loosen it.
Remove the sauce from the heat and keep it warm while you fry the tortillas.
Frying the Tortillas into Crispy Chips
If you are using fresh corn tortillas, stack them and cut the stack into 6 wedges, like cutting a pie. If you are using store-bought thick tortilla chips, skip this step.
Heat the remaining vegetable oil in a large cast iron skillet or heavy frying pan over medium-high heat until it reaches 350°F. If you do not have a thermometer, test the oil by dropping in a small piece of tortilla—it should sizzle immediately and float to the surface.
Working in batches, add the tortilla wedges to the hot oil in a single layer. Fry for 3 to 4 minutes, flipping occasionally with tongs, until the chips are golden brown and crispy. They will continue to crisp up slightly as they cool.
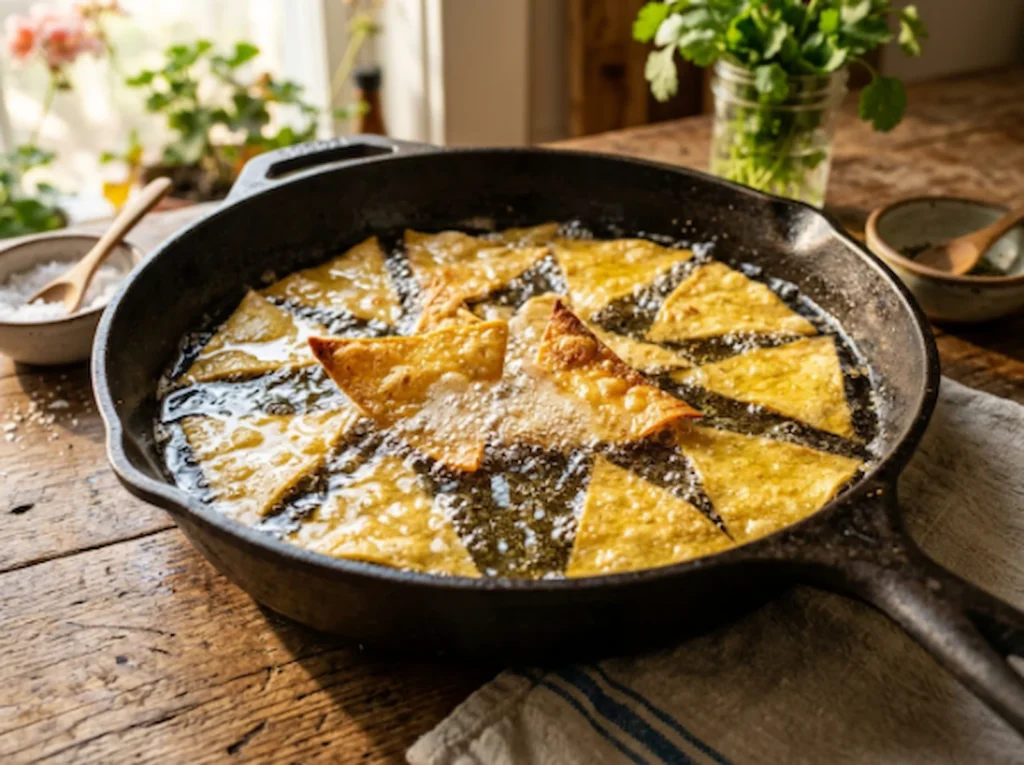
Transfer the fried chips to a plate lined with paper towels and sprinkle them lightly with kosher salt while they are still hot. Repeat with the remaining tortilla wedges.
Assembling and Melting the Cheese
Drain most of the frying oil from the skillet, leaving just a thin coating on the bottom. Reduce the heat to low. Add the crispy tortilla chips and shredded chicken to the skillet, spreading them out in an even layer.
Pour the warm red guajillo sauce over the chips and chicken, using a spatula or tongs to toss everything together gently. You want to coat the chips and chicken evenly, but leave some chip edges exposed so they retain a bit of crunch.
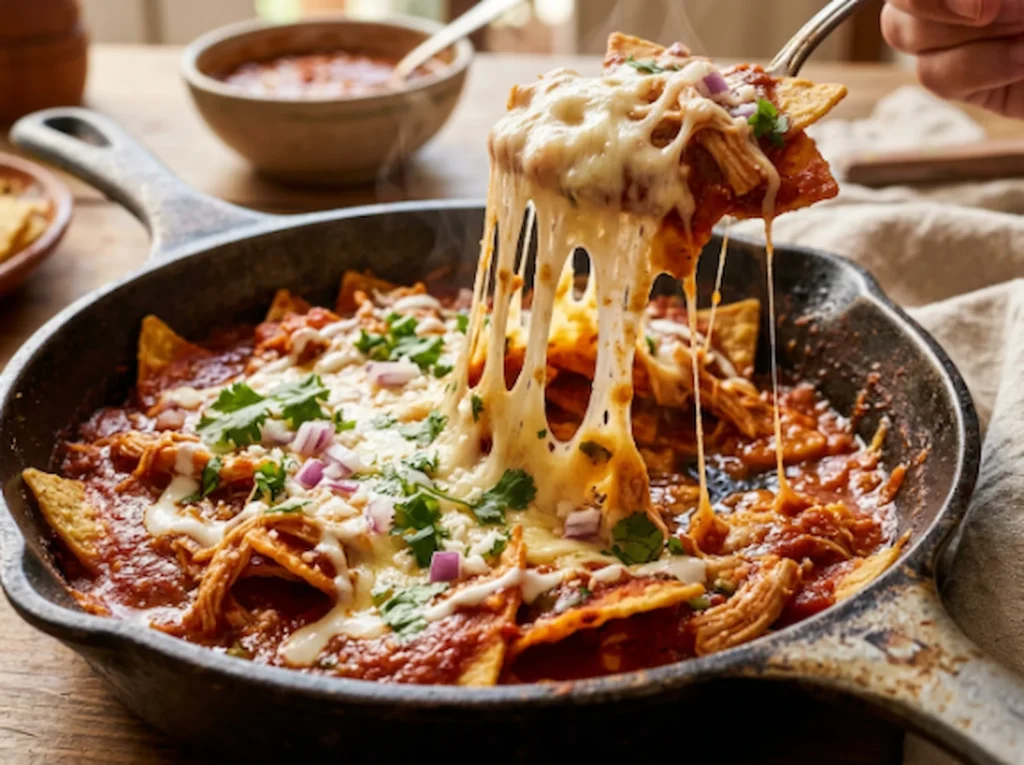
Sprinkle the shredded Oaxaca cheese evenly over the top. Cover the skillet with a lid or a large plate and let it sit on low heat for 2 to 3 minutes until the cheese melts and becomes gooey and stretchy.
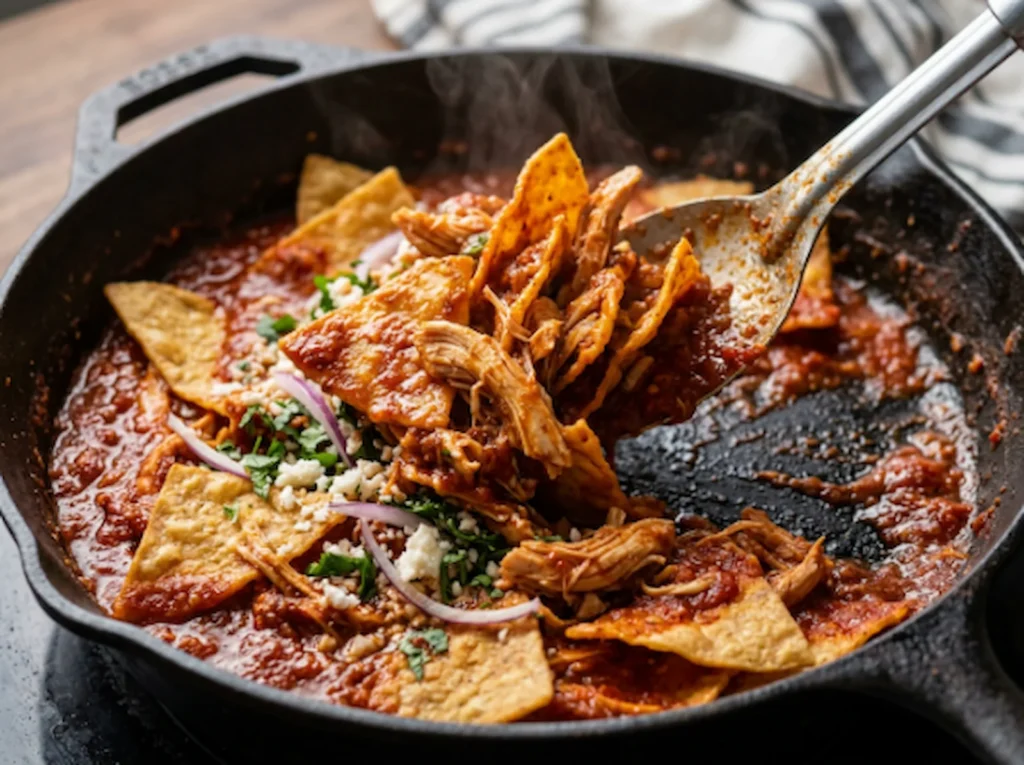
Do not overcook at this stage—you just want the cheese to melt, not the chips to turn completely soggy. The residual heat from the pan and the warm sauce will continue to soften the chips slightly even after you remove them from the heat.
Frying the Eggs and Plating
While the cheese melts, heat a separate nonstick skillet over medium heat and add a small pat of butter or a drizzle of oil. Crack the eggs into the skillet and fry them sunny-side-up until the whites are set but the yolks are still runny. Season with a pinch of salt and black pepper.
Divide the hot chilaquiles among four plates, making sure each serving gets plenty of chips, chicken, and melted cheese. Top each plate with a fried egg, placing it right in the center so the runny yolk can break and spread over the chilaquiles.
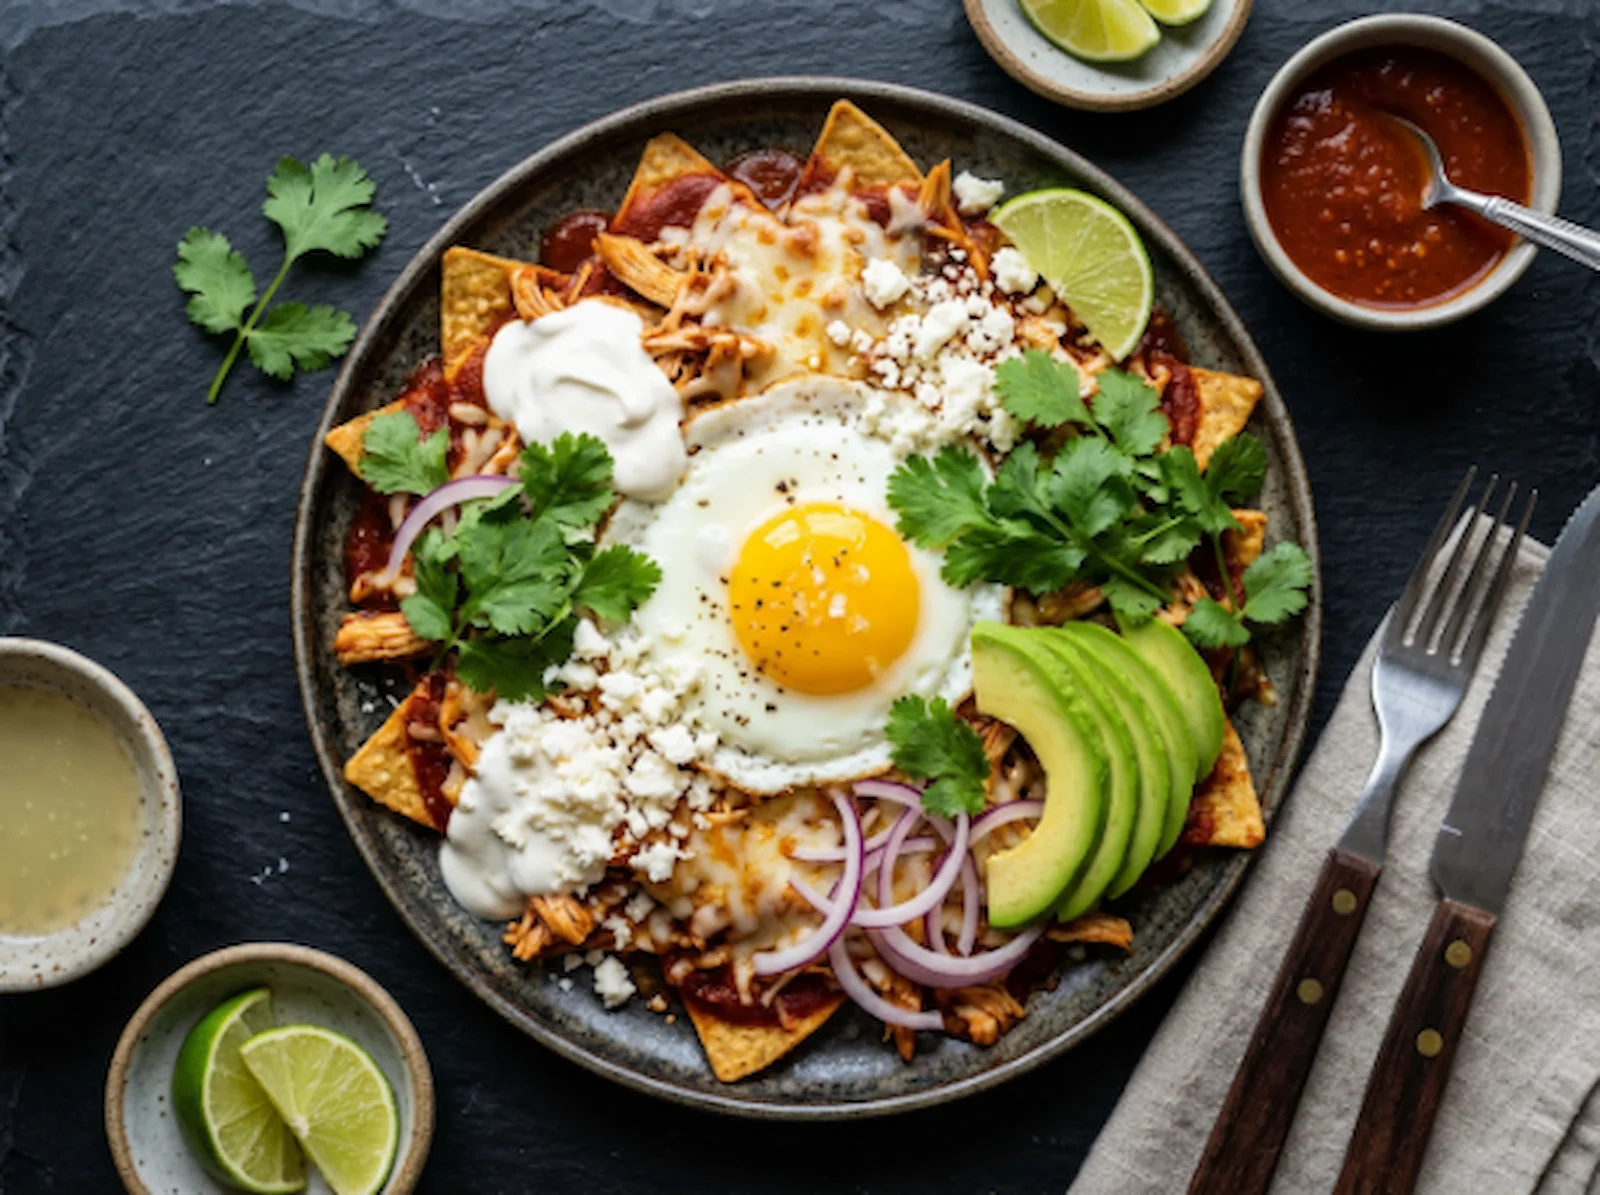
Drizzle Mexican crema over the top, then sprinkle with crumbled cotija cheese. Add sliced avocado and a handful of fresh cilantro leaves. Serve immediately while the chips still have some crisp edges and the cheese is stretchy and hot.
Chef Albert’s Insight
“Chilaquiles are a study in contrasts—crispy and tender, rich and bright, simple and deeply satisfying. The dish teaches you that timing is everything. Fry the chips too early and they turn stale. Add the sauce too soon and they turn to mush. Wait too long to serve and the magic window closes. But when you get it right—when the chips are still half-crispy, the sauce is warm and clinging, the cheese is stretching, and the yolk breaks over everything—you understand why this dish has been a Mexican breakfast staple for generations. It is not fancy. It is not delicate. It is honest, comforting food that rewards attention to detail and punishes shortcuts. Every time I make chilaquiles, I am reminded that the best cooking is not about complexity. It is about understanding when to move fast and when to wait, when to add heat and when to pull back, and when to stop tinkering and just eat.”
— Chef Albert, TastePillar
Nutrition Information (Per Serving)
| Nutrient | Amount |
|---|---|
| Calories | 520 kcal |
| Protein | 34g |
| Total Fat | 26g |
| Saturated Fat | 9g |
| Carbohydrates | 38g |
| Dietary Fiber | 6g |
| Sugars | 4g |
| Sodium | 680mg |
| Cholesterol | 245mg |
Note: Nutrition values are estimates based on standard ingredient measurements and may vary depending on specific brands and preparation methods.
Food Safety Temperature Guide
| Cooking Stage | Target Temperature |
|---|---|
| Frying Oil for Tortillas | 350°F / 177°C |
| Shredded Chicken (Pre-cooked Internal) | 165°F / 74°C |
| Fried Egg Whites (Fully Set) | 160°F / 71°C |
| Danger Zone (Avoid holding food in this range) | 40°F – 140°F / 4°C – 60°C |
| Reheating Leftovers (Internal) | 165°F / 74°C |
Always ensure that cooked chicken reaches a minimum internal temperature of 165°F to eliminate harmful bacteria. Use an instant-read thermometer for accuracy.
Storage and Reheating
| Storage Method | Duration | Best Reheating Method |
|---|---|---|
| Refrigerator (store components separately) | 2–3 days | Reheat sauce in a pan, add fresh chips, and top with fresh cheese and a new fried egg |
| Assembled Chilaquiles (not recommended) | Not ideal | Chips lose all crispness and turn completely soggy when stored with sauce |
| Red Guajillo Sauce (refrigerated) | Up to 5 days | Reheat gently on the stovetop, adding a splash of broth if it has thickened |
| Leftover Shredded Chicken | 3–4 days | Reheat in the microwave or on the stovetop with a bit of sauce to keep it moist |
Chilaquiles are best eaten immediately after assembly. If you must make components ahead, store the fried chips, red sauce, and shredded chicken separately, then assemble just before serving.
Frequently Asked Questions
Can I use canned red enchilada sauce instead of making my own?
You can, but the flavor will not be as complex or authentic. Canned enchilada sauce is often thinner, saltier, and lacks the fruity depth of homemade guajillo sauce. If you use it, choose a high-quality brand and taste it first to check the salt level.
What if I cannot find guajillo chiles?
Ancho chiles are the best substitute. They are milder and slightly sweeter, but they still provide the earthy, fruity base that defines a good red sauce. Use the same quantity and preparation method.
Can I make this vegetarian?
Yes. Omit the chicken and double the cheese, or add sautéed mushrooms, black beans, or roasted vegetables. Use vegetable broth instead of chicken broth in the sauce.
How do I keep the chips from getting too soggy?
Toss the chips with the sauce at the very last moment, and leave some chip edges exposed to the air. Do not cover the pan after adding the cheese—let the steam escape so the chips do not steam and soften too much.
Can I bake the tortilla chips instead of frying them?
Yes, though they will not have quite the same richness. Brush the tortilla wedges lightly with oil, arrange them on a baking sheet, and bake at 400°F for 8 to 10 minutes until crispy and golden.
Related Recipes You’ll Love
If you enjoyed the bold, comforting flavors of these cheesy chicken chilaquiles rojos, these TastePillar recipes will expand your Mexican breakfast and brunch game:
Cheesy Baked Chicken Quesadillas: The Crispy Trick You’ve Been Missing
Sheet Pan Steak Fajitas: A Gourmet Mexican Dinner with Zero Cleanup
Creamy Poblano Chicken (Pollo en Crema de Poblano)
Cheesy Chicken Chilaquiles Rojos for Breakfast
Ingredients
Equipment
Method
- Prepare the Dried Chiles: Heat a dry saucepan over medium heat. Toast guajillo chiles for 1–2 minutes until fragrant. Cover with hot water, remove from heat, and let soak for 10 minutes until softened.
- Blend the Red Sauce: Drain chiles and place in a blender with canned tomatoes, onion, garlic, chicken broth, cumin, and salt. Blend on high speed until completely smooth.
- Simmer the Salsa: Pour 1 tablespoon of oil into a saucepan over medium heat. Add the blended red sauce and simmer gently for 8–10 minutes until slightly thickened and darkened in color.
- Fry the Tortillas: Heat remaining oil in a large cast iron skillet over medium-high heat to 350°F. Fry tortilla wedges in batches for 3–4 minutes until golden and crispy. Drain on paper towels and sprinkle lightly with salt.
- Assemble and Melt Cheese: Reduce skillet heat to low. Add crispy tortilla chips and shredded chicken to the skillet. Pour warm red sauce over the top, tossing gently to coat while leaving some chip edges exposed. Sprinkle shredded Oaxaca cheese evenly over the surface, cover with a lid for 2–3 minutes until melted.
- Garnish and Serve: Top hot chilaquiles with fried eggs, a drizzle of Mexican crema, crumbled cotija cheese, sliced avocado, and fresh cilantro. Serve immediately.
Notes
Why Day-Old Tortillas Work Best: Using day-old corn tortillas that have dried out slightly produces much crunchier chips that hold up better under warm red sauce. Fresh tortillas contain more moisture and take longer to crisp up.

Control the Crispy-to-Soggy Ratio: For chips with more crunch, toss only half the chips with the sauce and leave the other half on top, exposed to the air. For softer, saucier chilaquiles, coat all the chips thoroughly and let them sit for 2–3 minutes before serving.

Adjusting Heat Levels: Guajillo chiles are mild. For more heat, add 1–2 dried arbol chiles or a fresh serrano pepper to the sauce. For less heat, use only 2 guajillo chiles and increase the tomatoes slightly.
 Make-Ahead Sauce: The red guajillo sauce can be made up to 5 days in advance and stored in an airtight container in the fridge. Reheat gently before tossing with the chips.

Frying Without a Thermometer: If you do not have a thermometer, test the oil by dropping in a small piece of tortilla. It should sizzle immediately and float to the surface. If it sinks and bubbles slowly, the oil is too cool.

Best Cheese Substitutes: If you cannot find Oaxaca cheese, whole-milk mozzarella or Monterey Jack are the best substitutes. Avoid using cheddar, which does not melt as smoothly and can taste too sharp.

Rotisserie Chicken Shortcut: One rotisserie chicken from the grocery store yields about 3–4 cups of shredded meat, which is perfect for this recipe. Remove the skin and shred the meat with two forks.

Egg Variations: For a richer dish, fry the eggs in the remaining chile-infused oil from the skillet. For a lighter version, poach the eggs and place them on top of the chilaquiles just before serving.

Serving Suggestions: Serve chilaquiles with refried beans on the side, a squeeze of fresh lime juice over the top, and extra hot sauce for those who want more heat. Sliced radishes add a fresh, crunchy contrast.

Why Chilaquiles Do Not Store Well: The chips absorb the sauce and lose all crispness within an hour of assembly. Always make chilaquiles fresh and eat them immediately for the best texture.