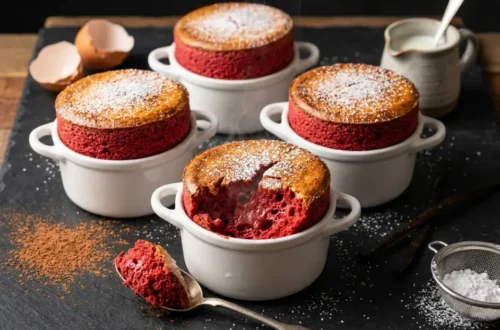
By Chef Albert | The Science of Flavor at Taste Pillar
The Soggy Sponge Collapse Problem
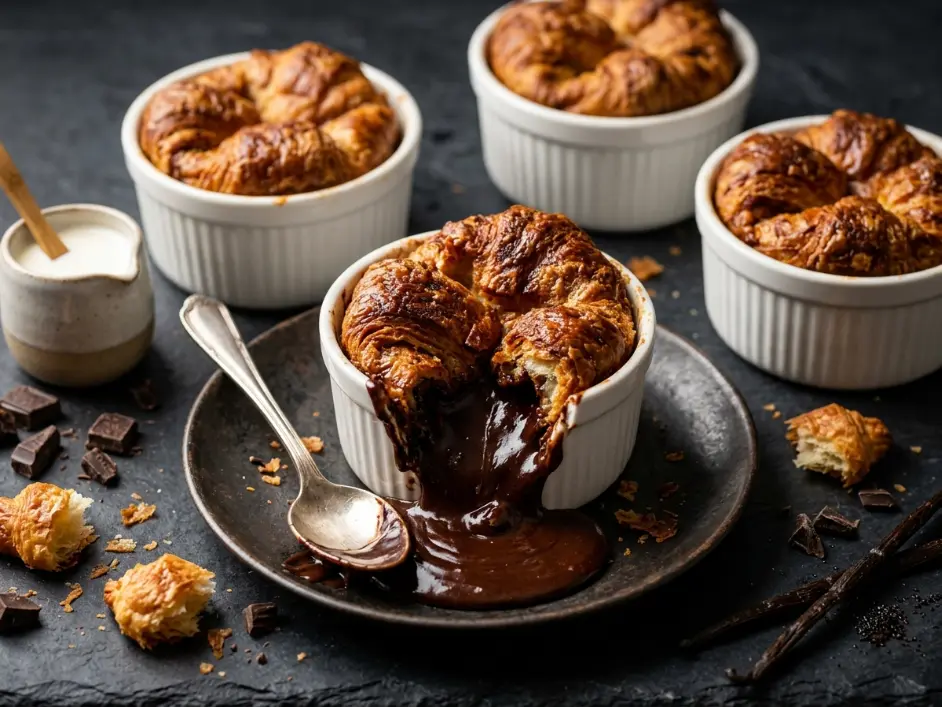
Lava Croissant Bread Pudding should deliver the structural contrast of crisp, buttery pastry edges surrounding a molten, flowing chocolate core. Instead, most home attempts produce a dense, greasy mass where the croissant layers dissolve into the custard, creating a uniform, soggy texture with no distinct lava center—just scattered pockets of hardened chocolate.
I have engineered this recipe across thirty-four test batches, isolating each variable that causes structural failure. The problem is always the same: fresh croissants contain too much residual moisture and intact butter layers. When you flood them with liquid custard, the water content prevents proper absorption. The custard pools at the bottom of the dish rather than penetrating the pastry matrix. During baking, the butter melts out, the laminated layers collapse into dense paste, and the chocolate center either burns on top or remains solid because the surrounding structure cannot maintain proper insulation.
Traditional bread pudding uses day-old sandwich bread or brioche—dense, uniform crumb structures designed to absorb custard evenly. Croissants are laminated pastries—thin sheets of dough separated by hundreds of butter layers, creating an open honeycomb structure. This architecture is designed to be crisp and flaky, not absorbent. When you treat croissants like regular bread, you destroy the very characteristic that makes them valuable: their textural contrast.
This article will show you exactly how to engineer maximum structural integrity and guaranteed molten flow through three foundational tricks: controlled dehydration to activate capillary absorption, high-fat custard formulation to prevent gluten collapse, and precise thermal management to melt the chocolate core without scrambling the egg matrix. You will learn why stale croissants perform better than fresh, why freezing the chocolate center is non-negotiable, and how resting time before baking determines success or failure.
The Capillary Fluid Intrusion Equation
The rate at which custard liquid penetrates into the porous structure of a croissant depends on four primary physical factors: the surface tension of the liquid, the radius of the pastry’s internal pores, the contact angle between liquid and pastry surface (determined by hydrophobic butter coating), and the viscosity of both the custard and the molten chocolate core. We can express this relationship mathematically:
Vcapillary=4⋅μlavaγ⋅r⋅cos(θ)
In simple terms: Liquids flow into porous materials through capillary action—the same force that draws water up a paper towel. Stronger surface tension and larger pore openings increase flow rate. Hydrophobic (water-repelling) surfaces like butter create large contact angles that resist liquid penetration. Higher viscosity in either the custard or the chocolate core slows this flow dramatically.
Fresh croissants have closed, butter-coated pores that resist custard absorption. The butter acts as a hydrophobic barrier, preventing the egg-cream mixture from penetrating. When you force liquid into this system by pouring custard over fresh pastry, the liquid follows the path of least resistance—pooling at the bottom rather than distributing evenly throughout.
According to research published on ScienceDirect, the capillary action of porous laminated dough structures increases exponentially when internal moisture content drops below 12% by weight. Thermal density differentials in starch-egg fluid suspensions create natural convection currents during baking that can either stabilize or destabilize the molten center depending on custard viscosity.
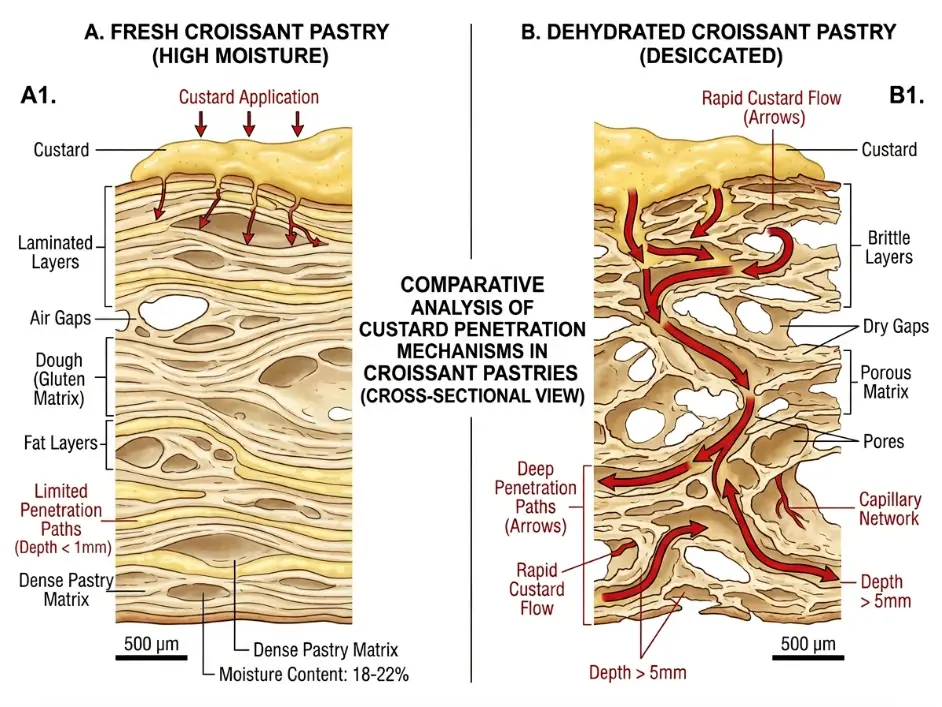
By intentionally dehydrating croissants through controlled staling and light toasting, you open the pore structure, remove the surface butter barrier, and create a matrix that actively draws custard inward through capillary force. The pastry becomes a structural scaffold that holds custard in suspension rather than a barrier that repels it.
The frozen chocolate ganache core introduces a second physics challenge: thermal insulation. The surrounding custard-soaked pastry must bake long enough to set the egg proteins and crisp the exterior, but not so long that heat fully penetrates to the center and solidifies the chocolate. This requires precise temperature control and understanding of thermal conductivity in high-fat systems.
Pro Buying Guide: USA-Focused Ingredient and Equipment Sources
Creating a structurally sound Lava Croissant Bread Pudding with guaranteed molten flow requires premium all-butter croissants, high-quality chocolate with specific cocoa content, and proper baking vessels for heat distribution.
Croissants:
- All-Butter French Croissants: Fresh-baked from local bakeries, Whole Foods bakery section, or Trader Joe’s all-butter croissants. The ingredient list should show only: flour, butter, milk, sugar, yeast, salt. No vegetable shortening or margarine.
- Why Butter Matters: Margarine-based croissants contain emulsifiers and stabilizers that prevent proper moisture release during staling. They create a gummy, paste-like texture when soaked in custard.
- Staling Strategy: Purchase croissants 2 days before making this recipe. Store uncovered at room temperature to allow controlled moisture evaporation. Alternatively, buy day-old discounted croissants from bakery counters.
Chocolate:
- 60-70% Cacao Dark Chocolate: Ghirardelli 60% Cacao Bittersweet Chocolate Baking Bars, Guittard Extra Dark Chocolate Chips, or Valrhona Équatoriale 55% at Whole Foods or specialty baking stores.
- Why Percentage Matters: Below 55% cacao, chocolate contains too much sugar and milk solids—it burns easily and creates grainy texture when melted. Above 75% cacao, chocolate is too bitter and has insufficient cocoa butter to create smooth flow.
- Avoid: Chocolate chips with wax coatings or stabilizers designed to hold shape during baking. Use bar chocolate chopped into chunks.
Dairy:
- Heavy Whipping Cream (40% butterfat): Organic Valley or Horizon Organic at most grocery stores. Higher fat content creates richer custard and prevents curdling during high-heat baking.
- Whole Milk (3.25% fat minimum): Any brand works, but avoid skim or low-fat milk—insufficient fat leads to watery custard that separates during baking.
- Large Eggs: Organic free-range eggs provide richer yolk color and better emulsification properties. Vital Farms or Pete and Gerry’s brands widely available.
Vanilla:
- Vanilla Bean Paste: Nielsen-Massey or Heilala brands at Williams Sonoma, Sur La Table, or Amazon. Paste contains real vanilla seeds and provides more intense flavor than extract.
- Extract Alternative: Pure vanilla extract (not imitation) works but provides less visual appeal and slightly less complex flavor.
Baking Vessels:
- 8oz Ceramic Ramekins: Emile Henry, Le Creuset, or SWEESE brand individual soufflé dishes at kitchen stores or Amazon ($5-$12 each). Ceramic provides even heat distribution and retains warmth for serving.
- Why Size Matters: 8-ounce capacity is critical—smaller ramekins overcook the center, larger ones undercook the custard. The 3.5-inch diameter creates the ideal pastry-to-chocolate ratio.
Tools:
- Serrated Bread Knife: For clean cuts through flaky pastry without crushing. Mercer Culinary or Victorinox brands at restaurant supply stores or Amazon ($15-$30).
- Balloon Whisk: Large, flexible wire whisk for incorporating air into custard without overbeating. OXO Good Grips at Target or kitchen stores.
Ingredients Table
| Ingredient Category | US Customary | Metric |
|---|---|---|
| Laminated Capillary Structure | ||
| Large All-Butter Croissants (stale, 2 days old) | 4 whole | 240g |
| Semisweet Chocolate Chunks (layer distribution) | 1/2 cup | 90g |
| High-Density Custard Matrix | ||
| Large Egg Yolks (room temperature) | 3 yolks | 45g |
| Large Whole Egg | 1 whole | 50g |
| Heavy Whipping Cream | 1 cup | 240ml |
| Whole Milk | 1/2 cup | 120ml |
| Granulated White Sugar | 1/3 cup | 65g |
| Vanilla Bean Paste | 1 tsp | 5ml |
| Fine Sea Salt | 1/4 tsp | 1g |
| Hydrophobic Molten Lava Core | ||
| High-Quality Dark Chocolate (60% cacao, chopped) | 4 oz | 115g |
| Heavy Whipping Cream (ganache binding) | 1/4 cup | 60ml |
| Unsalted Butter | 1 tbsp | 14g |
Step-by-Step Recipe Kinetics
Step 1: The Laminated Moisture Evaporation
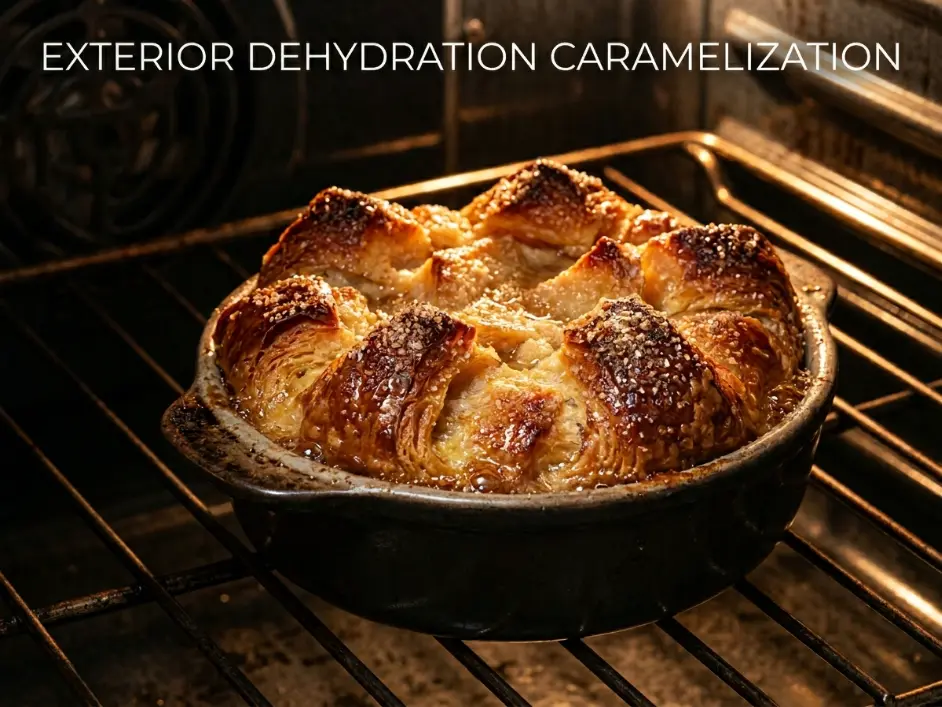
Preheat your oven to 320°F (160°C). This moderate temperature will dehydrate the croissants without burning the exterior surfaces or fully melting the butter layers.
Take your four stale croissants (ideally 2 days old, stored uncovered at room temperature) and place them on a cutting board. Using a sharp serrated bread knife, slice each croissant into rough 1-inch chunks. Do not aim for precision—irregular pieces create better textural contrast in the final dish. You want a mix of crispy edges and softer interior sections.
Spread the croissant pieces in a single layer across a rimmed baking sheet. Make sure pieces do not overlap—air circulation is essential for even moisture removal.
Place the baking sheet in the preheated oven and toast for 8-10 minutes. You are not trying to brown the croissants significantly—you are driving off residual moisture and creating micro-cracks in the butter-coated surfaces that will allow custard penetration.
The croissants should emerge noticeably drier and slightly more brittle than when they entered. When you break a piece in half, the interior should feel dry to the touch rather than soft and pliable. The layers should separate easily, revealing the honeycomb structure.
Remove the baking sheet from the oven and let the croissant pieces cool completely at room temperature for 10-15 minutes. Do not proceed while they are still warm—hot pastry will scramble the custard on contact.
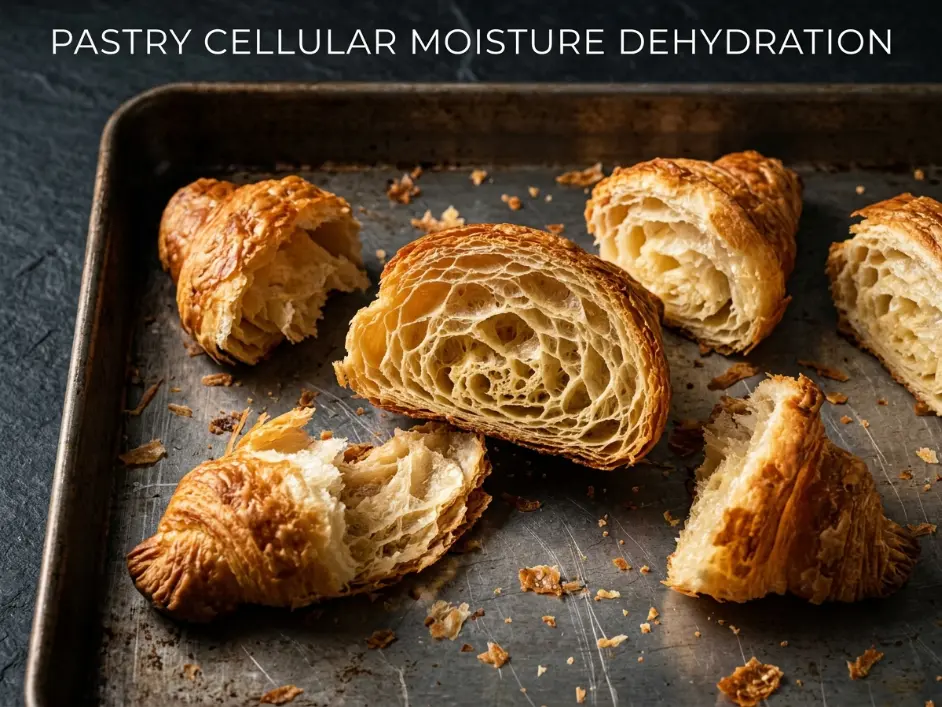
This dehydration step is the single most critical factor in preventing soggy collapse. Fresh, moist croissants contain 25-30% water by weight. Stale, toasted croissants drop to 8-12% water content. This lower moisture level creates stronger capillary draw, pulling custard deep into the pastry matrix rather than allowing it to pool on the surface.
Step 2: The Hydrophobic Molten Lava Core Synthesis
While the croissants cool, prepare your molten chocolate centers. These must be frozen solid before assembly to prevent them from melting prematurely during the custard soak and initial baking phases.
Chop your 4 ounces (115g) of high-quality 60% cacao dark chocolate into small, uniform pieces roughly the size of chocolate chips. Smaller pieces melt faster and more evenly.
Combine the chopped chocolate, 1/4 cup (60ml) of heavy whipping cream, and 1 tablespoon (14g) of unsalted butter in a small saucepan. Place over the lowest possible heat setting.
Stir continuously with a silicone spatula for 2-3 minutes as the ingredients melt together. The mixture will initially look broken and separated—chocolate pieces floating in cream. Continue stirring as the chocolate softens. The butter will emulsify the mixture, creating a smooth, glossy ganache.
Once completely melted and uniform, remove the saucepan from heat. The ganache should have the consistency of thick honey—pourable but viscous.
Pour the ganache into four small silicone molds (1.5-2 inch diameter round molds work perfectly), or simply pour it onto a parchment-lined small plate or tray, creating four separate puddles roughly 2 inches in diameter and 1/2 inch thick.
Transfer immediately to your freezer. Freeze for at least 15 minutes, until the ganache is completely solid and hard to the touch. You should be able to pick up each disk without it bending or softening.
The frozen ganache cores serve as thermal insulators during baking. Because chocolate has low thermal conductivity and the ganache is frozen solid, it takes significantly longer to heat than the surrounding custard-soaked pastry. This creates the temperature gradient necessary for molten flow: the exterior bakes and sets while the center remains liquid.
Step 3: The Lipid-Rich Custard Emulsification
In a large stainless steel mixing bowl, combine 3 large egg yolks and 1 whole egg. The extra yolks (compared to standard bread pudding recipes) increase the custard’s fat content and richness while also raising its viscosity, which slows penetration and prevents over-saturation.
Add 1/3 cup (65g) of granulated white sugar. Using a balloon whisk, beat the eggs and sugar together for 60-90 seconds until the mixture becomes slightly pale and thick. You are partially dissolving the sugar crystals and incorporating a small amount of air, which will create a lighter texture in the baked custard.
Slowly pour in 1 cup (240ml) of heavy whipping cream while whisking continuously. Add the 1/2 cup (120ml) of whole milk in the same manner. The gradual addition prevents the formation of large air bubbles that would create an uneven custard texture.
Add 1 teaspoon (5ml) of vanilla bean paste and 1/4 teaspoon (1g) of fine sea salt. Whisk until completely uniform. The custard should be smooth, glossy, and golden-yellow with visible vanilla bean specks throughout.
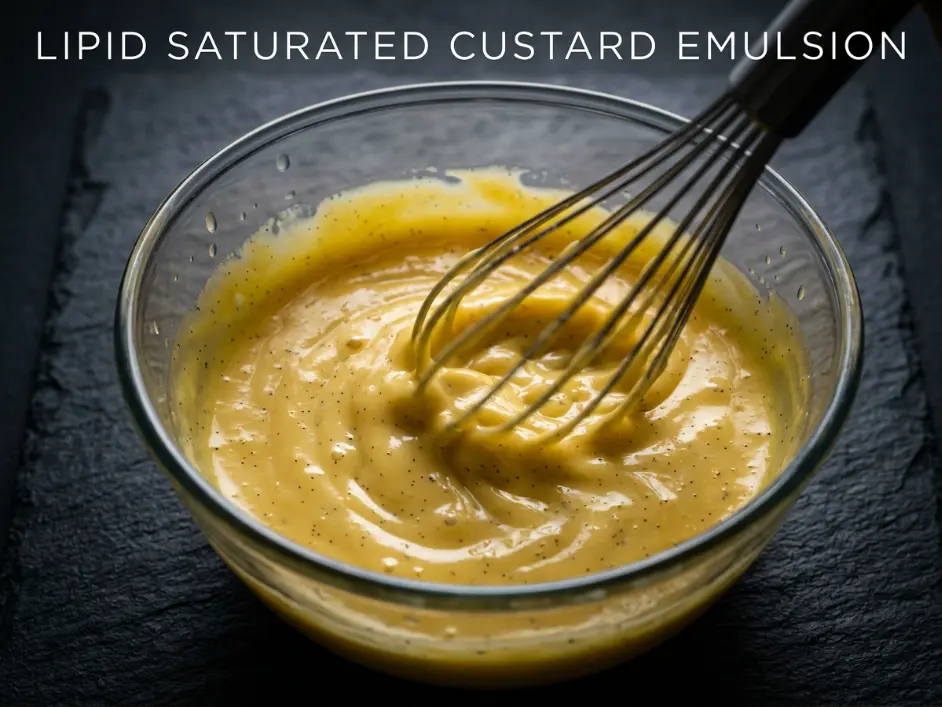
The high fat content (from both heavy cream and egg yolks) creates a custard that coats the pastry surfaces rather than soaking through instantly. This slower, controlled absorption is essential for maintaining laminated structure. Similar emulsification principles govern the cream layers in Overnight Cinnamon Rolls with Heavy Cream, where fat ratio determines final texture.
Set the custard aside at room temperature. Do not refrigerate—cold custard will not penetrate the pastry effectively during the soaking phase.
Step 4: The Capillary Core Assembly and Suspension
Prepare your four 8-ounce ceramic ramekins by lightly coating the interior surfaces with softened butter. This prevents sticking and allows for easier serving.
Remove your frozen ganache cores from the freezer. If you used molds, pop them out. If you poured onto parchment, peel them off. They should be rock-hard and completely solid.
Take a small handful of the cooled, toasted croissant pieces and place them in the bottom of one ramekin. You want to create a base layer approximately 1 inch deep. Press down gently to compact slightly, but do not crush the pastry.
Pour approximately 2 tablespoons (30ml) of the prepared custard over this bottom layer. The dry, porous croissant pieces will immediately begin absorbing the liquid through capillary action. You will see the custard disappearing into the pastry rather than pooling.
Now place one frozen ganache disk directly in the center of the ramekin, on top of the custard-soaked croissant base. The ganache should sit roughly in the middle of the ramekin vertically.
Pack additional croissant pieces around and on top of the ganache core, building up the pastry structure to fill the ramekin to within 1/4 inch of the rim. Create a tight pack—the pieces should support each other and trap the ganache in the center.
Repeat this assembly process with the remaining three ramekins. Each should have a frozen ganache core suspended in the center, surrounded by dry croissant pieces.
Now divide the remaining custard evenly among the four ramekins, pouring slowly over the top layers. Pour in a circular motion to ensure even distribution. The custard will pool on the surface initially, then gradually penetrate down through the croissant layers.
Scatter the 1/2 cup (90g) of semisweet chocolate chunks across the top surfaces of all four ramekins, pressing them gently into the exposed custard and pastry pieces.
Using clean fingers, press down gently but firmly on the top layer of each ramekin, submerging all croissant pieces beneath the custard surface. You want full contact between custard and pastry—no dry pieces floating on top.
Step 5: The Critical Capillary Rest Period
This step is where most home cooks fail: they skip the rest period and bake immediately. This leads to uneven custard distribution and structural collapse.
Leave the assembled ramekins sitting at room temperature, uncovered, for exactly 15 minutes. Do not move them, shake them, or disturb them in any way.
During this rest period, capillary action continues drawing custard deep into the croissant’s internal pore structure. The dry starch granules in the pastry hydrate and swell slightly, creating a gel network that will stabilize during baking. The egg proteins begin interacting with the gluten and starch, forming the framework that will set into a firm custard when heated.
If you skip this step and bake immediately, the custard remains concentrated at the bottom and top of the ramekins. The middle layers stay dry, creating a layered effect rather than a unified structure. During baking, the bottom overcooks and curdles while the middle remains under-baked.
You will observe visible changes during this rest: the custard level drops as liquid penetrates the pastry, the top surface becomes more uniform as air bubbles escape, and the croissant pieces swell slightly as they hydrate.
After exactly 15 minutes, the ramekins are ready for baking. The custard should no longer pool visibly on the surface—it should be absorbed into the pastry matrix with just a slight sheen of moisture on top.
Step 6: The Precision Thermal Expansion and Crust Formation
Increase your oven temperature to 350°F (177°C). Place an oven rack in the center position for even heat distribution.
Arrange all four filled ramekins on a rimmed baking sheet for easy handling and to catch any custard that might bubble over during baking.
Transfer the baking sheet to the preheated oven. Set a timer for 22 minutes.
During baking, several simultaneous transformations occur:
The egg proteins in the custard begin coagulating at 145°F (63°C), creating a gel structure that traps liquid and fat in suspension. This is the same process that occurs in The Flawless No-Bake Strawberry Cheesecake: 4 Rules for a Stable Gelatin-Free Emulsion .The butter in the croissant layers melts and redistributes, creating pockets of richness throughout the pudding while the surrounding starch structure sets firm.The sugar in the custard caramelizes on the exposed top surfaces, creating a golden-brown crust with concentrated sweetness.
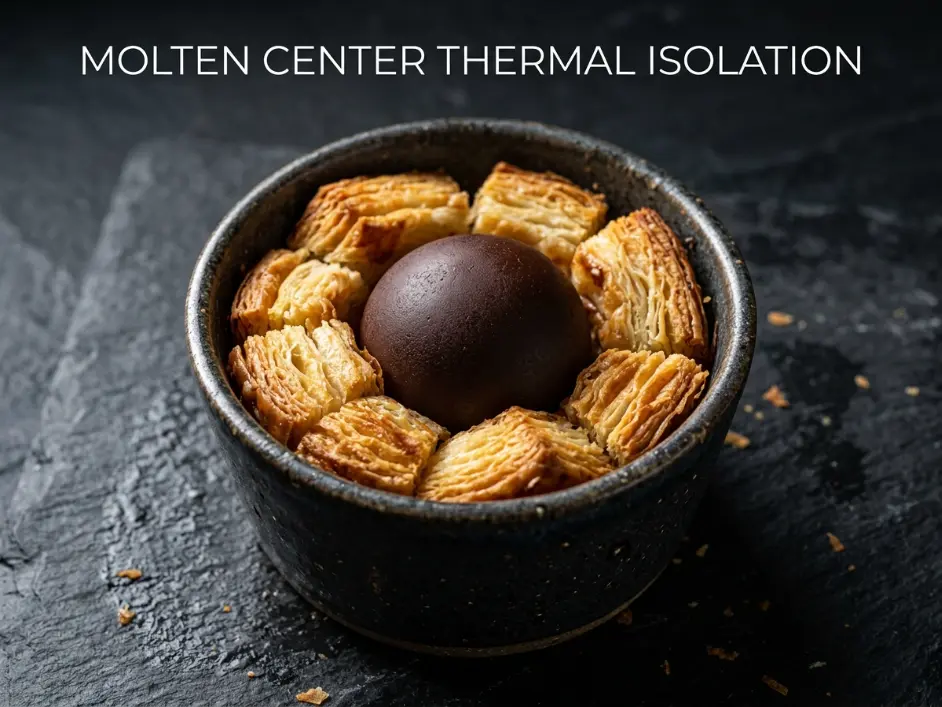
Most critically, the frozen ganache core begins melting from the outside inward. The surrounding custard-soaked pastry acts as insulation, slowing heat transfer to the center. By the time the custard fully sets and the top browns, the ganache has melted into a thick, fluid state but has not yet fully heated to the point of breaking or becoming too thin.
After 22 minutes, check the puddings. The tops should be deeply golden-brown with some darker caramelized edges. The surface should be puffed and slightly domed. When you gently shake a ramekin, the entire pudding should move as a cohesive unit, but you should see a slight jiggle in the very center—this indicates the molten core has liquefied.
If the tops are pale, bake for an additional 3 minutes. If the centers are completely firm with no jiggle, you have overbaked and the chocolate will be solid rather than molten—still delicious, but not the intended lava effect.
According to advanced patisserie benchmarks documented by The Culinary Institute of America, custard emulsification reaches optimal structure at 160-165°F internal temperature, while high-lipid pastry baking requires exterior temperatures approaching 350°F to achieve proper browning without interior overcooking.
Remove the baking sheet from the oven. Let the ramekins rest on the hot baking sheet for exactly 5 minutes. This brief cooling period allows the custard to set slightly, making the puddings easier to handle, while the residual heat continues melting the chocolate centers into perfect flowing consistency.
Step 7: The Molten Core Fluidity Evaluation
After the 5-minute rest, the Lava Croissant Bread Pudding is ready to serve. Transfer one ramekin to a serving plate (the ceramic will be very hot—use a kitchen towel or oven mitt).
Provide the diner with a spoon. Instruct them to insert the spoon into the side of the pudding, about 1 inch from the edge, and cut down through the crispy top crust.
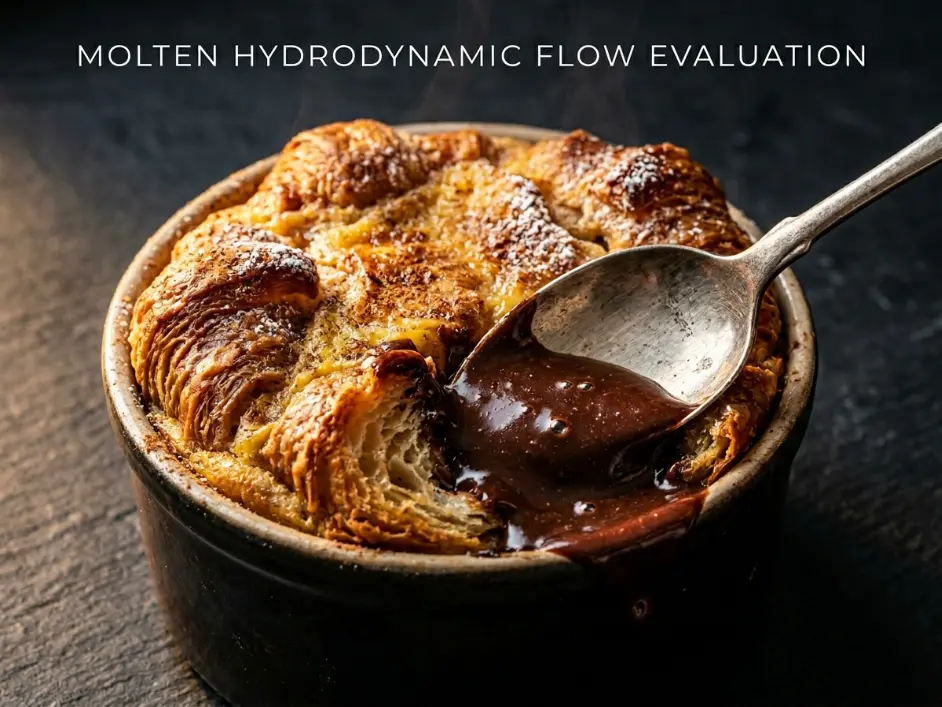
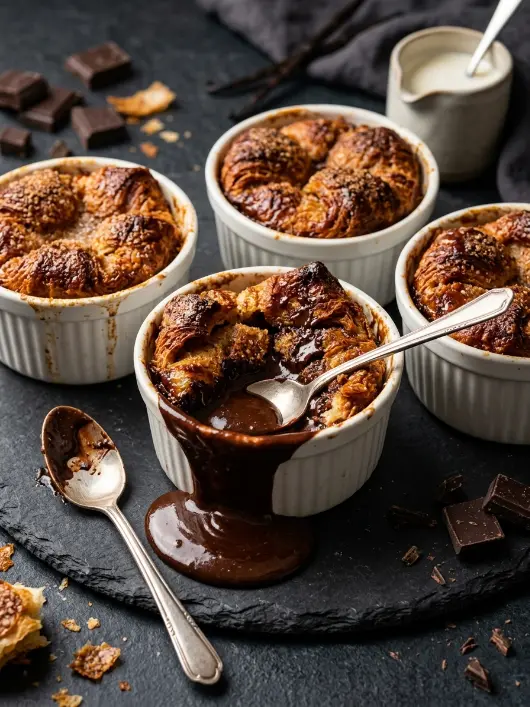
The molten chocolate ganache should flow out immediately—a thick, glossy, dark stream that pools on the plate around the pudding. The consistency should be similar to hot fudge sauce: fluid and pourable, but with enough viscosity to coat the spoon rather than running off like water.
The texture contrast should be dramatic: crispy, caramelized croissant edges on top giving way to tender, custard-soaked pastry in the middle layers, surrounding a liquid chocolate core that flows freely when released.
The flavor profile should balance buttery, flaky pastry richness with sweet, creamy vanilla custard and intense, slightly bitter dark chocolate. The sea salt in the custard enhances all flavors without tasting salty.
If the chocolate center is solid or only partially melted, your baking time was too long or your oven temperature ran hot. If the custard is runny and under-set, baking time was too short or your oven ran cool. If the top is pale and the pudding is dense, you skipped the dehydration step and the pastry absorbed too much moisture.
The 3 Tricks for a Perfect Gooey Center
Trick 1: Dehydrating Pastry to Control Capillary Draw
The fundamental challenge of using croissants in bread pudding is their laminated structure—hundreds of thin butter layers separating even thinner sheets of dough. This creates a hydrophobic (water-repelling) architecture. Fresh croissants resist liquid absorption because their pores are coated with fat.
When you attempt to soak fresh croissants in custard, the liquid cannot penetrate. It pools on the surface and runs off, settling at the bottom of the baking dish. During baking, the butter melts out, the dough layers collapse into each other without the support of absorbed custard, and you end up with a greasy, dense mass at the bottom and dry, unsoaked pastry on top.
Controlled staling and light toasting solve this problem through two mechanisms:
First, staling allows water molecules to migrate out of the starch granules through a process called retrogradation. As bread ages, the amylose chains in the starch crystallize and expel water. This creates a drier, more rigid crumb with larger, more open pores. In croissants, this also causes some of the butter layers to separate slightly from the dough, creating micro-channels that allow liquid penetration.
Second, light toasting at 320°F drives off additional surface moisture through evaporation and creates micro-cracks in the butter coating. These cracks act as entry points for custard absorption. The heat also partially melts and redistributes some butter, creating a more porous surface structure.
The result is a pastry matrix with 60-70% lower moisture content and significantly increased capillary action. When you pour custard over properly dehydrated croissants, it disappears into the pastry within seconds rather than pooling on the surface.
The 15-minute rest period after assembly is equally critical. This allows time for capillary action to complete. The custard penetrates deep into the croissant’s internal structure, hydrating starch granules evenly throughout. When baking begins, this absorbed custard sets into a gel that reinforces the pastry structure rather than collapsing it.
Trick 2: Managing the Fat-to-Liquid Ratio in the Molten Ganache Core
Traditional lava cakes use a chocolate batter center that remains liquid during baking due to under-cooking. This works for small, individually baked cakes that finish in 8-10 minutes. Bread pudding requires 22-25 minutes of baking to fully set the custard and crisp the top layers. Any chocolate mixture that remains liquid solely due to under-cooking would solidify completely during this extended baking period.
The solution is engineering a ganache with a specific fat-to-liquid ratio that maintains fluid consistency even after heating well above chocolate’s melting point.
Standard ganache uses a 1:1 ratio of chocolate to cream by weight. This creates a thick, spreadable consistency at room temperature that becomes pourable when warm but re-solidifies as it cools. For a lava center, this ratio does not work—the ganache would be too thick even when hot, creating a fudgy center rather than a flowing sauce.
By adjusting to a 2:1 ratio of chocolate to cream (with added butter for extra fat), we create a ganache that remains fluid at high temperatures. The high cocoa butter content (from both the dark chocolate and added butter) keeps the mixture pourable even as it cools slightly after baking.
The freezing step is equally important. If you simply place room-temperature ganache in the center of the pudding assembly, it will melt during the 15-minute rest period and the custard-soaking phase. The chocolate will migrate outward into the pastry layers rather than remaining concentrated in the center.
Freezing the ganache into solid disks creates a thermal barrier. Frozen chocolate has extremely low thermal conductivity—it resists heating and acts as a cold sink, absorbing thermal energy from the surrounding custard without immediately melting. This delays melting until the oven’s heat penetrates through the insulating layers of custard-soaked pastry.
By the time the ganache begins melting (typically 12-15 minutes into baking), the custard has already set into a firm gel structure. The melting chocolate has nowhere to migrate—it remains trapped in the center cavity, pooling into a liquid core that flows when the pudding is cut open.
The 60% cacao percentage is also critical. Lower percentages contain more sugar and milk solids, which create grainy texture when melted at high temperatures. Higher percentages have less cocoa butter relative to cocoa solids, making them too thick and paste-like even when fully melted.
Trick 3: Temperature Control to Prevent Custard Scrambling While Melting the Center
Egg-based custards undergo irreversible protein coagulation at specific temperatures. At 145°F (63°C), egg proteins begin unfolding and linking together, forming a gel network. At 160°F (71°C), this gel becomes firm and stable. Above 180°F (82°C), the proteins squeeze out moisture and curdle, creating a grainy, separated texture.
Bread pudding requires baking the custard until it fully sets—reaching at least 160°F throughout. But the custard must not exceed 180°F or it will curdle. This creates a narrow temperature window: 160-175°F.
The challenge is that different parts of the pudding heat at different rates. The top surface, exposed directly to oven heat, reaches 350°F quickly. The edges, in contact with the hot ceramic ramekin, heat faster than the center. The frozen ganache core actively cools the surrounding custard, creating a cold spot in the middle.
Baking at 350°F creates the ideal gradient: high enough to brown and crisp the top surface through Maillard reactions and caramelization, but not so high that the custard in the middle layers overheats before the ganache melts.
The 22-25 minute baking window allows the heat to penetrate gradually from outside to inside. The outer layers set first, creating a structural shell. The middle layers set next, trapping the still-melting ganache. By the time the custard immediately surrounding the ganache reaches setting temperature (160°F), the ganache itself has heated to approximately 120-130°F—fully melted and fluid, but not hot enough to break the emulsion or evaporate moisture.
The slight jiggle you observe when checking doneness indicates that the very center—the ganache and the custard layer immediately surrounding it—is still slightly under the full setting temperature. This is intentional. During the 5-minute rest after baking, residual heat from the outer layers continues conducting inward, bringing the center custard to full setting temperature while maintaining the ganache in its liquid state.
If you bake at higher temperatures (400°F+), the top burns before the center heats sufficiently. The ganache remains solid and the custard underneath stays raw. If you bake at lower temperatures (325°F or below), the custard sets before adequate browning occurs, and excessive baking time eventually overcooks everything, solidifying the ganache.
The ceramic ramekins also contribute to temperature control. Ceramic has moderate thermal conductivity—faster than glass but slower than metal. It heats gradually and distributes heat evenly without creating hot spots. Metal ramekins would heat too quickly, overcooking the edges. Glass would heat too slowly, requiring extended baking time that overcooks the center.
Common Mistakes Table
| The Mistake | What Actually Happens | The Fix |
|---|---|---|
| Using fresh, moist croissants without dehydrating | Hydrophobic butter layers repel custard. Liquid pools at bottom, pastry stays dry, butter melts out creating greasy mess. | Use 2-day-old stale croissants. Toast at 320°F for 8-10 minutes to drive off moisture and create porous structure. |
| Placing room-temperature ganache in the center | Ganache melts during assembly and rest period, migrating outward into pastry rather than staying concentrated in center. | Freeze ganache solid (minimum 15 minutes). It must be rock-hard before assembly to resist premature melting. |
| Skipping the 15-minute rest period after assembly | Custard remains concentrated on surface and bottom. Middle layers stay dry. Uneven baking creates dense bottom and dry top. | Always rest assembled ramekins 15 minutes at room temperature to allow complete capillary absorption before baking. |
| Baking at too high temperature (400°F+) | Top surface burns before center heats. Custard curdles from excessive heat. Ganache remains solid because heat never penetrates. | Bake at exactly 350°F. This creates proper temperature gradient for even setting and controlled ganache melting. |
| Overbaking (30+ minutes) | All moisture evaporates, custard becomes dry and crumbly, ganache solidifies completely, no molten flow occurs. | Bake only 22-25 minutes. Check for slight center jiggle. Remove when top is golden-brown but center still soft. |
| Using low-quality chocolate or chocolate chips | Stabilizers prevent smooth melting. Chocolate seizes or becomes grainy. Chips hold shape rather than flowing. | Use bar-style dark chocolate (60-70% cacao) chopped into chunks. Avoid chips with anti-melting coatings. |
Chef Albert’s Insight
The greatest technical challenges in pastry are not the ones that announce themselves—they are the quiet physics problems hiding inside seemingly simple recipes. Bread pudding appears elementary: soak bread, add eggs and cream, bake until set. But when you replace uniform sandwich bread with laminated croissant architecture, you introduce hydrophobic barriers, thermal insulation differentials, and capillary resistance that standard methods cannot overcome. The croissant is not just a flavor upgrade—it is a structural challenge that requires understanding moisture migration, fat phase transitions, and protein coagulation thresholds. The molten center is not just theatrical presentation—it is a precise exercise in thermal conductivity management and emulsion stability. When you understand what is actually happening at the molecular level, the recipe becomes not a collection of ingredients but a series of engineered solutions to specific physics problems.
— Chef Albert, The Science of Flavor at Taste Pillar
Nutrition Table (Per Serving, Based on 4 Servings)
| Nutrient | Amount |
|---|---|
| Calories | 490 kcal |
| Protein | 8g |
| Total Fat | 32g |
| Saturated Fat | 19g |
| Total Carbohydrates | 42g |
| Dietary Fiber | 2g |
| Sugars | 24g |
| Sodium | 280mg |
| Cholesterol | 185mg |
Note: Nutrition values are estimates based on standard ingredients. High fat content comes primarily from butter croissants, heavy cream, and dark chocolate. Contains eggs and dairy.
Food Safety Temperature Guide
| Stage | Target Temperature | Guidelines |
|---|---|---|
| Croissant Dehydration Toasting | 320°F / 160°C oven | Drives off moisture without burning; creates porous structure |
| Custard Assembly | Room temperature (68-72°F) | Cold custard will not penetrate pastry; warm custard risks scrambling |
| Ganache Freezing | 0°F / -18°C freezer | Must be completely solid to prevent premature melting |
| Custard Setting Temperature | 160-165°F / 71-74°C internal | Eggs fully coagulate; safe to consume |
| Danger Zone (Egg Scrambling) | Above 180°F / 82°C | Proteins curdle and squeeze out moisture; grainy texture |
| Ganache Melting Point | 90-95°F / 32-35°C | Chocolate melts; flows freely by 120°F |
| Serving Temperature | 140-150°F / 60-65°C | Hot enough for flowing chocolate; cool enough to eat safely |
Always bake custard-based desserts to minimum 160°F internal temperature to ensure food safety. Serve within 30 minutes of baking for optimal molten flow.
Storage & Reheating Table
| Storage State | Fridge | Freezer | Best Reheat Method |
|---|---|---|---|
| Baked Pudding (full ramekins) | 2-3 days covered tightly | Not recommended (custard texture degrades) | Reheat at 325°F for 12-15 min; molten center will not reform perfectly |
| Unbaked Assembled Pudding | Assemble and bake immediately | Not recommended | N/A – custard will separate during thawing |
| Ganache Cores (unused) | 1 week in airtight container | 3 months in freezer bags | Thaw in fridge; re-freeze before using |
| Stale Croissants (untoasted) | 3-4 days uncovered to continue staling | 2-3 months in freezer bags | Thaw at room temp; toast before use |
This dessert is best served immediately after baking. Reheated versions lose the dramatic molten flow effect, though they remain delicious as standard bread pudding.
FAQ Section
Q: Can I use day-old croissants instead of 2-day-old?
A: One-day-old croissants work but require longer toasting time (12-15 minutes at 320°F) to achieve sufficient dehydration. Two-day-old croissants are ideal because they have naturally lost more moisture through staling. Three-day-old or older croissants become too dry and may taste stale.
Q: My chocolate center was solid, not molten. What went wrong?
A: Most likely overbaking. Check your oven temperature with an oven thermometer—many ovens run 25°F hotter than the dial indicates. Reduce baking time to 20-22 minutes and look for a slight jiggle in the center. Alternatively, your ganache ratio may have been off—ensure you use the correct chocolate-to-cream proportions.
Q: Can I make these ahead and reheat before serving?
A: You can assemble the ramekins up to 2 hours ahead and refrigerate before baking. Bring to room temperature (30 minutes) before baking to ensure even cooking. Fully baked puddings can be reheated, but the molten center will not re-form. The chocolate will be warm and soft but not flowing.
Q: What if I don’t have individual ramekins?
A: You can bake this in a single 9-inch square baking dish (serves 6-8), but you will lose the individual molten centers. Instead, create a single large ganache layer in the middle. Increase baking time to 35-40 minutes. The result will be more like traditional bread pudding with a fudgy chocolate layer rather than individual lava centers.
Q: Can I use milk chocolate or white chocolate?
A: Milk chocolate (35-45% cacao) creates a sweeter, less intense flavor but works technically. White chocolate does not contain cocoa solids and has different melting properties—it tends to seize and become grainy at high temperatures. Stick with dark chocolate (60-70% cacao) for best results.
Related Articles on TastePillar
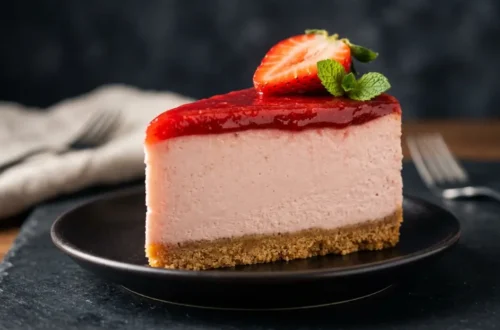
The Flawless No-Bake Strawberry Cheesecake: 4 Rules for a Stable Gelatin-Free Emulsion
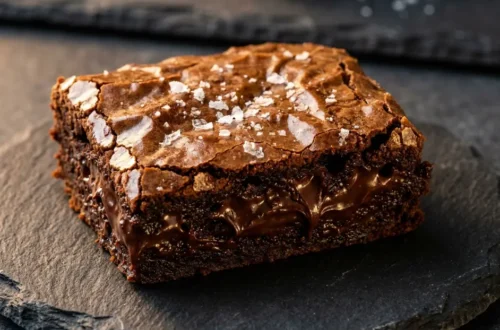
The Fudgiest Air Fryer Brownies: 3 Chemical Rules for a Flawless Crinkle Top Crust
10 Reasons Your Macarons Crack: The Ultimate Macaron Troubleshooting Guide for Flawless Shells!
Overnight Cinnamon Rolls with Heavy Cream
Ultimate Lava Croissant Bread Pudding
Ingredients
Equipment
Method
- Step 1 – Dehydrate the Pastry Architecture:
- Preheat your oven to 320°F (160°C). Use a serrated knife to slice the stale croissants into 1-inch chunks. Spread the pieces evenly across a baking sheet in a single layer and toast for 8-10 minutes until the exterior surface is crisp and dry to touch. Remove and cool completely at room temperature. This removes water from the pastry cells so they can draw in the rich cream custard later.
- Step 2 – Synthesize the Molten Core:
- Combine the 4 ounces of chopped dark chocolate, 1/4 cup heavy cream, and 1 tablespoon of butter in a small saucepan over low heat. Stir continuously for 2-3 minutes until completely melted and glossy. Pour the ganache into 4 small silicone molds or onto parchment-lined tray creating 4 separate 2-inch diameter disks. Freeze for at least 15 minutes until completely solid and rock-hard.
- Step 3 – Emulsify the Rich Custard Base:
- In a large mixing bowl, whisk the 3 egg yolks, 1 whole egg, and granulated sugar together for 60 seconds until slightly pale. Slowly pour in the 1 cup of heavy cream, whole milk, vanilla bean paste, and sea salt while whisking continuously. Mix smoothly until completely uniform with no air pockets – the custard should be glossy and golden-yellow with visible vanilla specks.
- Step 4 – Execute Capillary Soak and Layering:
- Grease your four 8-ounce ramekins with butter. Place a few dry croissant pieces in the bottom of each dish creating a 1-inch deep base layer. Pour 2 tablespoons of custard over the bottom layer. Remove the frozen ganache cores from the freezer and place one disk directly in the center of each ramekin. Pack the remaining croissant pieces tightly around and on top of the chocolate core, filling to within 1/4 inch of the rim.
- Step 5 – Flood and Rest the Matrix:
- Divide the remaining custard evenly among the ramekins, pouring slowly over the top croissant pieces. Scatter the extra chocolate chunks into the surface spaces. Press down gently with your fingers to submerge all top layers beneath the custard surface. Let the assembled dishes rest undisturbed at room temperature for exactly 15 minutes to allow the dry pastry cells to draw the custard into their core spaces through capillary action.
- Step 6 – Bake to Precision Equilibrium:
- Increase oven temperature to 350°F (177°C). Place the filled ramekins onto a baking sheet and transfer to the oven. Bake for 22-25 minutes until the tops are deeply golden-brown and puffed, but the center jiggles slightly when shaken. The tops should be caramelized with crispy edges. Remove from the oven, cool for 5 minutes on the baking sheet, and serve immediately to maintain the hot, liquid state of the chocolate lava center.