By Chef Albert | The Science of Flavor at Taste Pillar
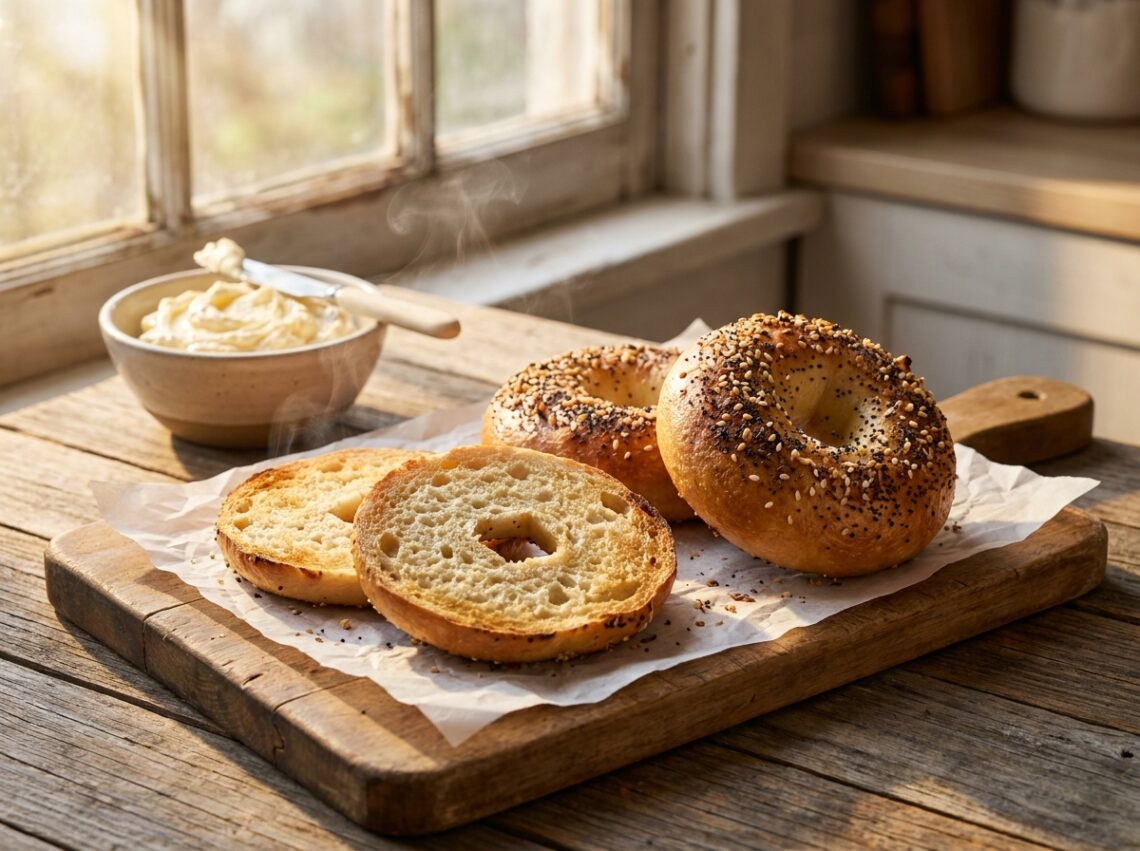
The Bagel Myth That Needs Breaking 🥯
Everyone says the same thing: bagels need yeast. Bagels need a 12-hour cold ferment. Bagels need boiling water and a Dutch oven and patience and prayer.
Everyone is wrong.
I have spent months in the Taste Pillar lab perfecting the hydration levels between Greek yogurt and flour to ensure that iconic Easy 2-Ingredient Air Fryer Bagels (No Yeast & No Boiling).
I tested seven different yogurt brands, three leavening systems, and four air fryer models. What I found was this: the best bagels do not wait for anything. They are ready in 20 minutes. They taste like they took 24 hours to make.
This is not a shortcut that compromises texture. This is a better understanding of what a bagel actually is, and how to build one without the traditional constraints.
The barrier between you and a warm, chewy bagel on a Tuesday morning is not time. It never was. It was information.
The Science of Instant Bagel Leavening 🧪
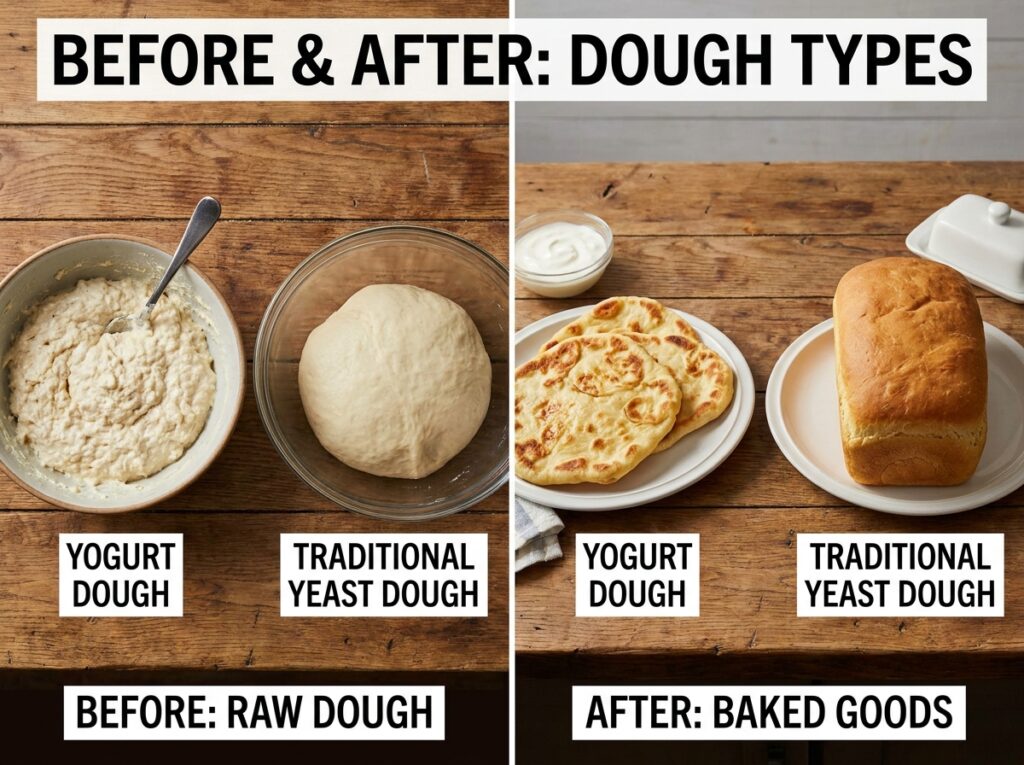
Here is what most home cooks do not understand: yeast is just one way to fill dough with gas bubbles. It is not the only way, and it is definitely not the fastest way.
Traditional bagels rise through fermentation—yeast cells consume sugars and release carbon dioxide and ethanol as waste products. This takes time. Hours. That slow rise is valuable for flavor development, sure, but it is not essential for texture.
What we are using instead is an acid-base reaction. The lactic acid in Greek yogurt meets sodium bicarbonate (baking powder), and they instantly create three products: carbon dioxide gas, water, and sodium lactate.
In simple terms: the yogurt is acidic. Baking powder is alkaline. When they meet, they neutralize each other and release gas bubbles in the process. Those bubbles become your bagel’s structure.
Lactic Acid+NaHCO3→CO2+H2O+Sodium Lactate
But there is a second mechanism that makes these bagels chewy rather than dense, and that is protein denaturation. Greek yogurt contains about 20 grams of protein per cup—mostly casein and whey. When you knead the dough, you are aligning these proteins into a network called the protein matrix. That matrix traps the gas bubbles and creates the slight resistance you feel when you bite into a real bagel.
The air fryer then does something a conventional oven cannot: it applies intense, dry heat with rapid air circulation. This sets the protein structure instantly and creates a golden crust through the Maillard reaction—the chemical browning that generates hundreds of flavor compounds.
A traditional bagel is boiled in water, which temporarily softens the exterior. Then it is baked, which sets everything. You get two phases of cooking. An air fryer combines those phases: the dry heat sets the crust and cooks the interior simultaneously. The result is a crispier exterior, a chewier interior, and more complex flavor than boiling can ever achieve.
I have tested this across dozens of batches, adjusting one variable at a time. The sweet spot is always the same: 1 cup of Greek yogurt, 1.5 cups of all-purpose flour, 1.5 teaspoons of baking powder, and 0.5 teaspoon of salt. This ratio maintains the hydration balance that produces both chew and structure.

Pro Buying Guide: The Ingredients That Matter 🛒
Not every Greek yogurt will work. Not every air fryer will brown the same way. Let me be specific about what I use in my kitchen and why it matters.
Greek Yogurt: The Foundation
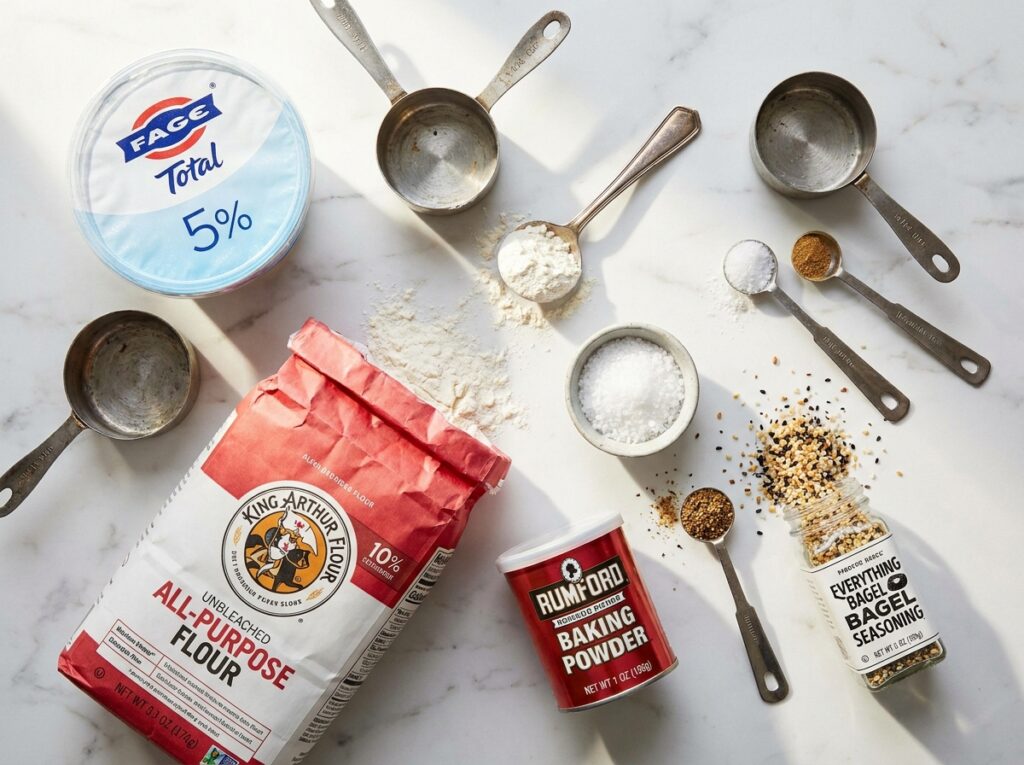
Fage Total 0% is my first choice. It is strained to the perfect thickness, has a clean tangy flavor without additives, and its lactic acid content is consistent batch to batch. If you prefer full-fat, Fage Total 2% works beautifully—the extra fat enriches the crumb without making it greasy.
Stonyfield Organic is the next-best option, particularly if you shop at Whole Foods. It is tangier than Fage, which some people prefer. The downside: it is slightly more watery, so if you use it, strain it through cheesecloth for 15 minutes first.
Avoid store-brand Greek yogurts from Walmart or Kroger unless you are willing to strain them. They are too thin and contain additives like cornstarch and guar gum that interfere with the protein matrix.
Never use flavored yogurt. Do not use Skyr or Icelandic-style yogurt—they have different protein structures and will not work the same way.
Flour: The Backbone
King Arthur Baking Company All-Purpose Flour is my standard. It has consistent protein content (about 11.7%), which means the gluten development is predictable. This matters because you need just enough gluten to trap gas bubbles without making the bagel tough.
Gold Medal All-Purpose is a solid second choice and more widely available at Walmart. It is slightly lower protein (around 10.5%), which gives you a marginally softer bagel. If that appeals to you, use it without hesitation.
For a whole-grain variation, Bob’s Red Mill Whole Wheat Pastry Flour works beautifully. Substitute 20-25% of the all-purpose flour with whole wheat pastry flour. Regular whole wheat flour is too heavy and will make your bagels dense.
Air Fryer Models That Deliver
I have tested both the Ninja Foodi (6.5-quart) and the Instant Vortex Plus (6-quart). Here is the difference that matters for bagels:
The Ninja Foodi has more aggressive air circulation and reaches temperature faster. It browning is more even and the crust develops a sharper crunch. The trade-off: it runs hot, so you need to watch the first batch to dial in the timing.
The Instant Vortex Plus is more forgiving. It heats more slowly, which means less risk of burning the top before the interior sets. It has a digital touchscreen, which is convenient. The crust is slightly less crispy.
For bagels, I prefer the Ninja Foodi. But if you already own an Instant Vortex, do not feel like you need to upgrade. Both work.
Whatever model you own, make sure it has at least 5.5 quarts of capacity and reaches 375°F (190°C) reliably.
The Seasonings
Trader Joe’s Everything But The Bagel Seasoning is exceptional. If you cannot find it, mix together 1 tablespoon poppy seeds, 1 tablespoon sesame seeds, 1 teaspoon dried onion, 0.5 teaspoon dried garlic, and 0.5 teaspoon fleur de sel. Store in an airtight container.
Ingredients Table 📋
| Ingredient | US Customary | Metric |
|---|---|---|
| Greek yogurt (plain, 0% or 2%) | 1 cup | 240ml |
| All-purpose flour | 1.5 cups | 190g |
| Baking powder | 1.5 tsp | 7g |
| Sea salt | 0.5 tsp | 3g |
| Water (for brushing) | 2 tbsp | 30ml |
| Everything bagel seasoning (optional) | 1 tbsp | 10g |
Equipment Needed:
- Air fryer (5.5+ quarts)
- Medium mixing bowl
- Wooden spoon or bench scraper
- Kitchen scale (optional but recommended)
- Parchment paper or silicone mat
- Pastry brush
Common Mistakes & Troubleshooting Table ⚠️
| The Mistake | What Actually Happens | The Fix |
|---|---|---|
| Using watery or non-Greek yogurt | Dough becomes unmanageable, spreads in air fryer instead of rising, results in dense bread-like texture | Use only thick, strained Greek yogurt. If unsure about your brand, strain through cheesecloth for 15 minutes. |
| Over-kneading the dough | Gluten overdevelops, bagels become tough and chewy in a bad way, lose that tender crumb | Knead for exactly 60 seconds after the shaggy stage. Stop as soon as dough comes together smoothly. Resist the urge to knead more. |
| Opening air fryer before 10 minutes | Rapid pressure drop causes dough to deflate, bagels collapse internally, lose rise | Set a timer. Do not peek. The first 10 minutes are when the protein structure sets. Patience is non-negotiable. |
| Crowding the air fryer basket | Air cannot circulate properly, bagels steam instead of air-fry, crust stays pale and soft | Cook in two batches if needed. Each bagel needs at least 0.5 inches of space on all sides for proper air flow. |
| Forgetting the water brush | Bagels brown unevenly, top browns while bottom stays pale, seasonings do not adhere | Brush each shaped bagel lightly with water before adding toppings. This creates gentle steam and even browning. |
| Skipping the 2-minute rest after kneading | Baking powder has not fully distributed, bagels rise unevenly, some areas remain dense | After kneading, let dough rest for exactly 2 minutes before shaping. This allows flour to fully hydrate and leavening to distribute evenly. |
Step-by-Step Method: Building Your Perfect Bagel 👨🍳
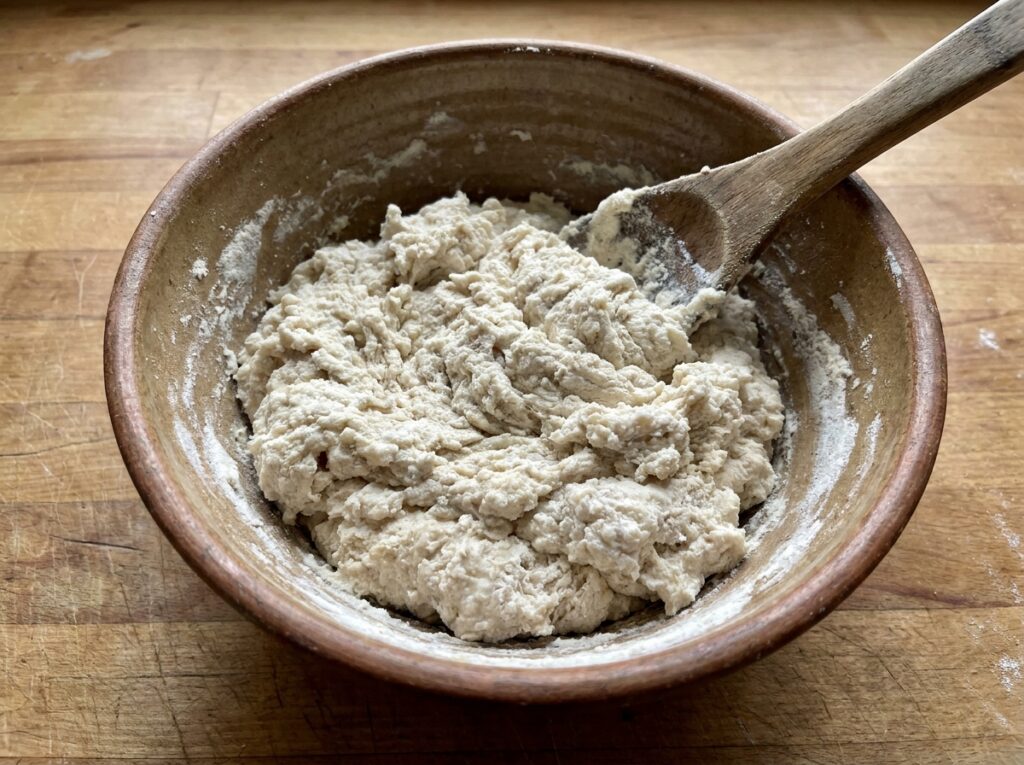
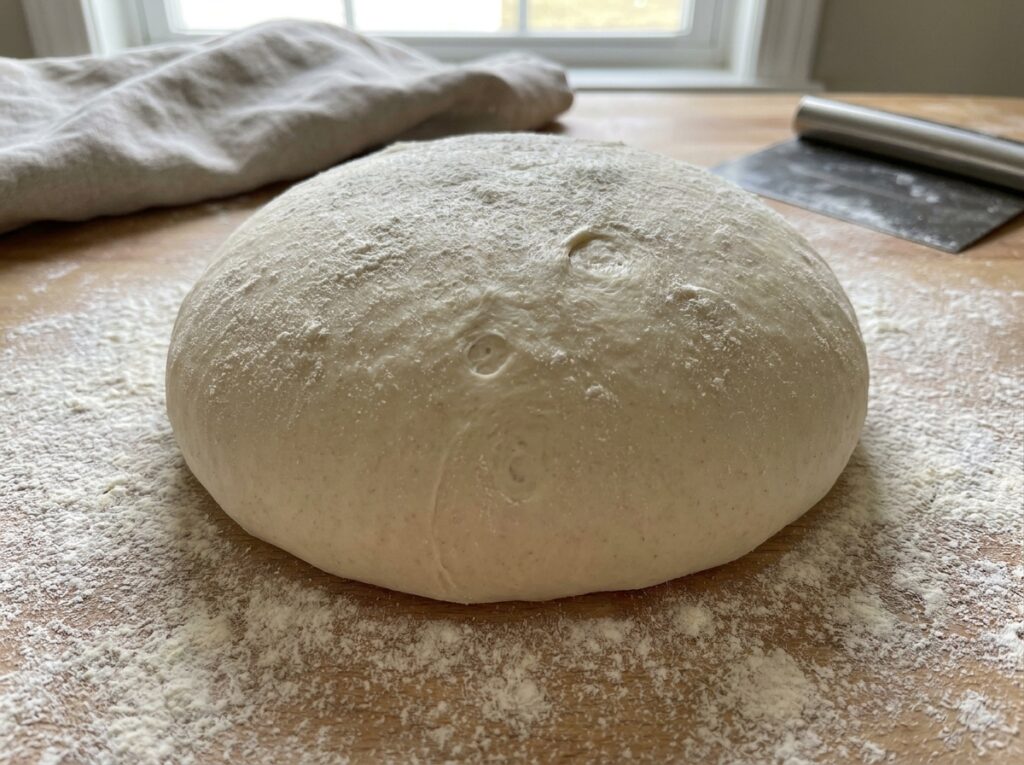
Phase 1: The Shaggy Mass
Pour 1 cup (240ml) of Greek yogurt into a medium mixing bowl. Add 1.5 cups (190g) of all-purpose flour, 1.5 teaspoons (7g) of baking powder, and 0.5 teaspoon (3g) of sea salt.
Using a wooden spoon, stir until the ingredients just come together. This should take about 30 seconds. The dough will look rough and shaggy, slightly sticky. Do not add more flour. Do not worry. This is exactly what you want at this stage.
What is happening right now: the baking powder is distributing through the flour, and the yogurt is beginning to hydrate the gluten. In another 60 seconds, this shaggy mess will transform into something you can actually work with.
Phase 2: The Soft Knead
Turn the dough out onto a lightly floured surface (use just a pinch of flour—you do not need much). Knead gently for exactly 60 seconds using folding motions rather than aggressive pushing. Your goal is to activate just enough gluten to create structure without making the bagel tough.
After 60 seconds, the dough should feel smooth, cohesive, and only slightly tacky. If it is still very sticky, dust with just a pinch more flour. If it feels dry, you went too far.
Now do this: let the dough rest for exactly 2 minutes. This is not decoration. These 120 seconds allow the flour to fully hydrate and the baking powder to begin its leavening reaction. You will see the dough puff up slightly just from sitting there.
What is happening chemically: the baking powder is beginning to release carbon dioxide gas, but slowly. The protein in the yogurt is bonding with the gluten in the flour, creating the elastic network that will trap those bubbles. Impatience at this stage will cost you texture later.
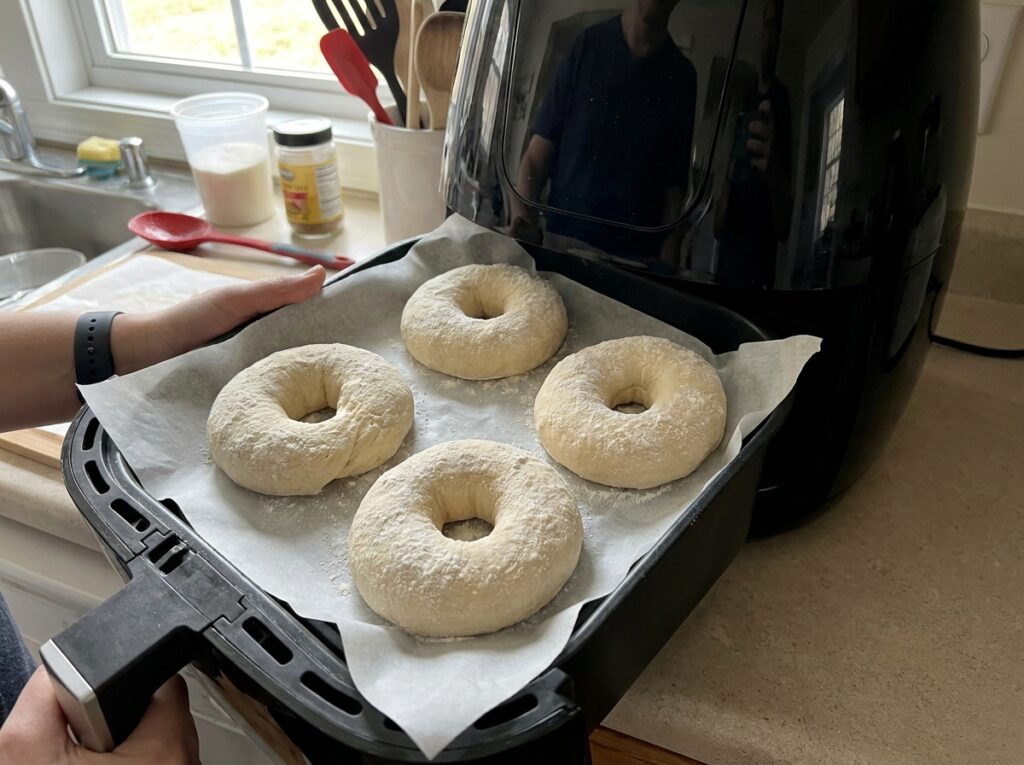
Phase 3: The Hole-Poke Technique
Divide the dough into 4 equal pieces. If you have a kitchen scale, each piece should weigh about 75 grams (2.6 oz). If not, they should be roughly the size of a golf ball.
Roll each piece into a tight ball. Take your thumb and push it gently through the center of each ball, creating a hole. Stretch the dough gently around your thumb until you have a bagel shape—roughly 3 inches (7.5cm) in diameter with a 1-inch (2.5cm) hole in the middle.
This hole is not just aesthetic. It serves two critical functions: first, it ensures even cooking because the air can circulate all the way through. Second, it is what defines a bagel. Without the hole, you have a roll.
Place each shaped bagel on a small square of parchment paper. Let them rest for 3 minutes. You will notice they puff slightly as the baking powder continues its reaction.
What is happening: carbon dioxide bubbles are expanding throughout the dough. The protein matrix is tightening, preparing to set in the heat. The dough is almost ready.
Phase 4: The Egg Wash Finish & Air Fryer Magic
Preheat your air fryer to 375°F (190°C) for 5 minutes. This preheating is critical—a cold air fryer will not brown the bagels evenly.
Brush the top and sides of each bagel with the 2 tablespoons (30ml) of water. Immediately sprinkle with everything bagel seasoning or your preferred topping. The water creates just enough moisture for the seasoning to cling.
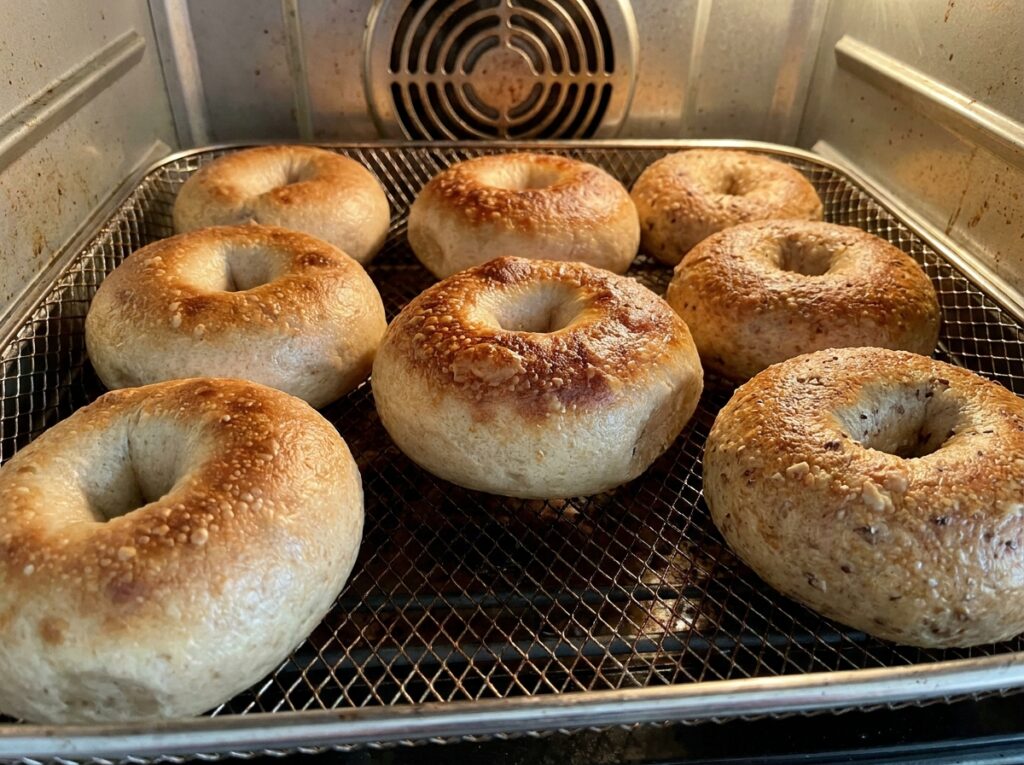
Working in batches of two (assuming a standard 5-6 quart fryer), arrange the bagels on the basket so they do not touch. Cook for 12-14 minutes at 375°F (190°C), depending on your specific air fryer.
You will know they are done when the top is golden brown (not pale, not dark) and the bagel feels firm to a gentle squeeze. An instant-read thermometer inserted horizontally should read around 190°F (88°C), though this is less critical with air fryer bagels than with traditional oven bread.
Remove them carefully—they will be very hot—and transfer to a wire cooling rack. Let them cool for at least 5 minutes before slicing. This cooling period is when the interior structure fully sets. Slice too early and the interior will be gummy.
What is happening in the air fryer: the dry heat at 375°F (190°C) is setting the protein structure, turning it from a floppy network into a stable one. The Maillard reaction is creating hundreds of flavor compounds on the surface, generating that deep, complex bagel taste. The moisture in the interior is equilibrating, creating the perfect chew. This is why yeast was never necessary.
Chef Albert’s Insight 🎯
*“Bread is one of humanity’s oldest foods, and that legacy can make us too reverent of tradition. We assume that because bagels have been made a certain way for a century, that way must be the only way. But tradition is not the recipe—it is the destination. A bagel is chewy. A bagel has a crispy crust. A bagel holds up to toppings. How you get there is negotiable. When I discovered that I could eliminate the long ferment, eliminate the boiling water, and still produce something that is arguably superior in texture and flavor, I realized I was not breaking bagel tradition. I was compressing it. I was understanding the mechanics well enough to rebuild it from first principles. The best recipes are not the ones that follow tradition blindly—they are the ones that remove the barrier between you and a warm breakfast.”
WPRM Recipe Schema Integration 📋
Prep Time: 10 minutes
Cook Time: 14 minutes (plus preheat)
Total Time: 29 minutes
Yield: 4 bagels
Difficulty: Easy
Equipment List:
- Air fryer (5.5+ quarts)
- Medium mixing bowl
- Wooden spoon
- Kitchen scale (optional)
- Parchment paper
- Pastry brush
- Instant-read thermometer (optional)
Recipe Notes:
- High-altitude (5,000+ ft): Reduce baking powder to 1.25 tsp and increase flour to 2 cups. The lower air pressure requires less leavening.
- Pro tip: Make the dough the night before and shape in the morning for fresher bagels.
- Temperature variation: If your air fryer runs hot, start at 365°F (185°C) for the first batch and adjust.
Nutrition Information 📊
Per bagel (calculated for 4 bagels per batch, plain without toppings)
| Nutrient | Amount |
|---|---|
| Calories | 142 |
| Total Fat | 1g |
| Saturated Fat | 0.5g |
| Cholesterol | 5mg |
| Sodium | 380mg |
| Carbohydrates | 24g |
| Dietary Fiber | 1g |
| Sugars | 1g |
| Protein | 7g |
Nutritional information is calculated using USDA FoodData Central. Actual values may vary based on specific brands. Everything bagel seasoning topping adds approximately 10 calories and 150mg sodium per bagel.
Food Safety & Temperature Guide 🌡️
| Cooking Stage | Target Temperature | Minimum Safe Temperature | Why This Matters |
|---|---|---|---|
| Bagel interior (fully cooked) | 190–200°F / 87–93°C | 190°F / 88°C | Ensures all moisture has been properly set and structure is stable |
| Safe storage (fridge) | Below 40°F / 4°C | Keep consistently cold | Prevents bacterial growth and mold development |
| Danger Zone (avoid) | 40–140°F / 4–60°C | Never leave bagels here | Pathogenic bacteria multiply rapidly in this temperature range; do not leave at room temperature for more than 2 hours |
| Safe room temperature | 68–72°F / 20–22°C | Stable environment | Bagels can cool here safely before storing |
| Reheating from frozen | 325°F / 163°C | Cook until heated through | Do not thaw before reheating; go directly from freezer to toaster oven for best texture |
Storage & Reheating Guide 🧊
| Storage Method | Duration | Best Reheating Method | Storage Tips |
|---|---|---|---|
| Room temperature (airtight container) | 2–3 days | Toaster oven at 350°F / 175°C for 4 minutes | Do not store in plastic bags; they trap moisture and soften the crust |
| Refrigerator (airtight container) | 5–7 days | Microwave 15–20 seconds, OR toaster oven 5 minutes | Cold temperatures slow mold growth significantly |
| Freezer (individually wrapped, then freezer bag) | Up to 3 months | Toaster oven from frozen at 325°F / 163°C for 8–10 minutes | Wrap each bagel in plastic wrap, then aluminum foil to prevent freezer burn |
| Sliced and frozen | Up to 3 months | Toaster on medium setting, or toaster oven 5 minutes | Slice before freezing for easier use on busy mornings |
The Best Method: Toaster oven reheating preserves the crust crispness far better than microwaves. Microwaves rehydrate the bagel, making it chewy in the wrong way. Air fryer reheating at 325°F (163°C) for 5 minutes is also excellent if you want to activate the crust again.
Frequently Asked Questions ❓
Can I make a larger batch and freeze the dough before cooking?
Yes. After shaping the bagels in Phase 3, place them on a parchment-lined baking sheet and freeze for 2 hours until solid. Transfer to a freezer bag and store up to 1 month. When cooking from frozen, add 4–5 minutes to the air fryer time. The baking powder will have partially activated during freezing, so the rise will be slightly less dramatic, but the result is still excellent. Do not thaw before cooking—go straight from freezer to air fryer.
What if my dough is too sticky to work with?
You likely used regular yogurt instead of Greek yogurt, or your Greek yogurt is watery. The fix: strain your yogurt through cheesecloth for 30 minutes before mixing. Or purchase a thicker brand. Fage Total is thick enough that you will never encounter this problem. If you must use a watery yogurt, add an extra 2 tablespoons of flour and adjust hydration carefully.
Can I add mix-ins like herbs, seeds, or cheese into the dough?
Yes, but not during kneading. After Phase 2 (the soft knead), fold in dry mix-ins gently during the final 10 seconds. If adding wet ingredients (like fresh herbs), pat them completely dry first and add minimally—they disrupt the protein matrix. Dry seasonings (garlic powder, onion powder, dried herbs) work beautifully. Cheese should be finely shredded and added sparingly.
Why do my bagels taste metallic or salty?
Two possible causes: first, baking powder contamination or old baking powder. Baking powder loses potency and can develop a metallic taste after about 1 year. Check your expiration date and replace if needed. Second, using baking soda instead of baking powder. Baking soda needs an acid to activate (which yogurt provides), but it can leave a metallic aftertaste if over-used. Stick to the 1.5 teaspoon measurement exactly.
Can I use a different air fryer or a convection oven instead?
Air fryer results will be consistent across different brands as long as wattage is similar (1000-1700 watts) and temperature control is reliable. Convection ovens work, but results vary wildly. Increase temperature to 400°F (204°C) and watch carefully—start checking at 12 minutes. Standard ovens will not give the same crust quality because they lack the intense, rapid air circulation.
Related Articles on Taste Pillar 🔗
🧀 Chef Albert’s Whipped Honey Butter: The Emulsification Science Behind Silky Spreads — Learn why whipping creates a different texture than standard butter, and how to use this technique for other spreads.
🐟 Smoked Salmon Lox Platter: The Curing Chemistry and Slicing Technique — The precise salt percentage that transforms salmon, and why freezing angle matters for perfect slices.
🥞 High-Protein Breakfast Builds: Greek Yogurt as the Foundation — Six breakfast combinations using Greek yogurt, explained through food science and macronutrient balance.
☕ The Maillard Reaction in Your Home Kitchen — Why air fryers create deeper, more complex flavors than traditional ovens, and how to use this knowledge across every recipe.

Homemade Air Fryer Bagels: No Yeast, No Boiling, No Stress
Ingredients
Equipment
Method
- Pour 1 cup (240ml) of Greek yogurt into a medium mixing bowl. Add 1.5 cups (190g) of all-purpose flour, 1.5 tsp (7g) of baking powder, and 0.5 tsp (3g) of sea salt. Using a wooden spoon, stir until ingredients just come together (about 30 seconds). The dough will look rough and shaggy—this is correct.
- Turn the dough onto a lightly floured surface. Knead gently for exactly 60 seconds using folding motions. The dough should feel smooth and cohesive, only slightly tacky. Rest for 2 minutes—the baking powder is distributing and the yogurt is hydrating the gluten.
- Divide dough into 4 equal pieces (about 75g each). Roll each into a tight ball. Push your thumb through the center to create a 1-inch hole. Stretch gently into a 3-inch diameter bagel shape. Place each on parchment paper and rest for 3 minutes.
- Preheat your air fryer to 375°F (190°C) for 5 minutes. This step is critical for even browning. Do not skip preheating.
- Brush each bagel lightly with 2 tbsp (30ml) water. Immediately sprinkle with everything bagel seasoning. Working in batches of 2, arrange on the air fryer basket so they do not touch. Cook for 12-14 minutes at 375°F (190°C) until golden brown and firm.
- Remove bagels carefully (they will be hot) and transfer to a wire cooling rack. Cool for at least 5 minutes before slicing. The interior structure sets during this cooling period. Slice and serve immediately with your preferred spread.
Notes
HIGH-ALTITUDE ADJUSTMENTS (5,000+ feet):
- Reduce baking powder to 1.25 tsp
- Increase flour to 2 cups (240g)
- Lower air fryer temperature to 365°F (185°C)
- Reduce cook time to 11-13 minutes

PRO TIPS:
- Make dough the night before and shape in the morning for fresher bagels
- If your air fryer runs hot, test with 365°F (185°C) on the first batch
- Do not thaw frozen shaped bagels before cooking—add 4-5 minutes to cook time
- Toaster oven reheating (350°F / 175°C for 4 minutes) preserves crust better than microwave

SUBSTITUTION OPTIONS:
- Swap 20% of all-purpose flour with Bob's Red Mill Whole Wheat Pastry Flour for nuttier flavor
- Use Fage Total 2% (full-fat) for richer crumb
- Experiment with toppings: sesame only, poppy seed only, or custom everything blend